Before You Begin
Before onboarding your GenAI application, ensure you have:- Fiddler Account - Active access to your Fiddler instance
- GenAI Application - An LLM-powered application or agent ready to instrument
- Admin or Project Admin Role - Permissions to create projects and applications
Key Concepts
Projects
A project represents a workspace that groups related AI applications together. Projects are typically organized by product, team, or use case. Each project can have:- Multiple applications under it
- Shared team members and permissions
- Consolidated monitoring and analytics across all applications in that project
Applications
An application is the specific GenAI system or integration you want to monitor. It represents one instance of your deployed LLM or agentic workflow—such as a chatbot, summarization API, or evaluation pipeline. Each application has its own:- Application ID - Unique identifier for SDK integration
- Monitoring configuration - Metrics, evaluators, and alerts
- Data streams - Span events, traces, and performance metrics
Onboard Your Application
Choose Your Project
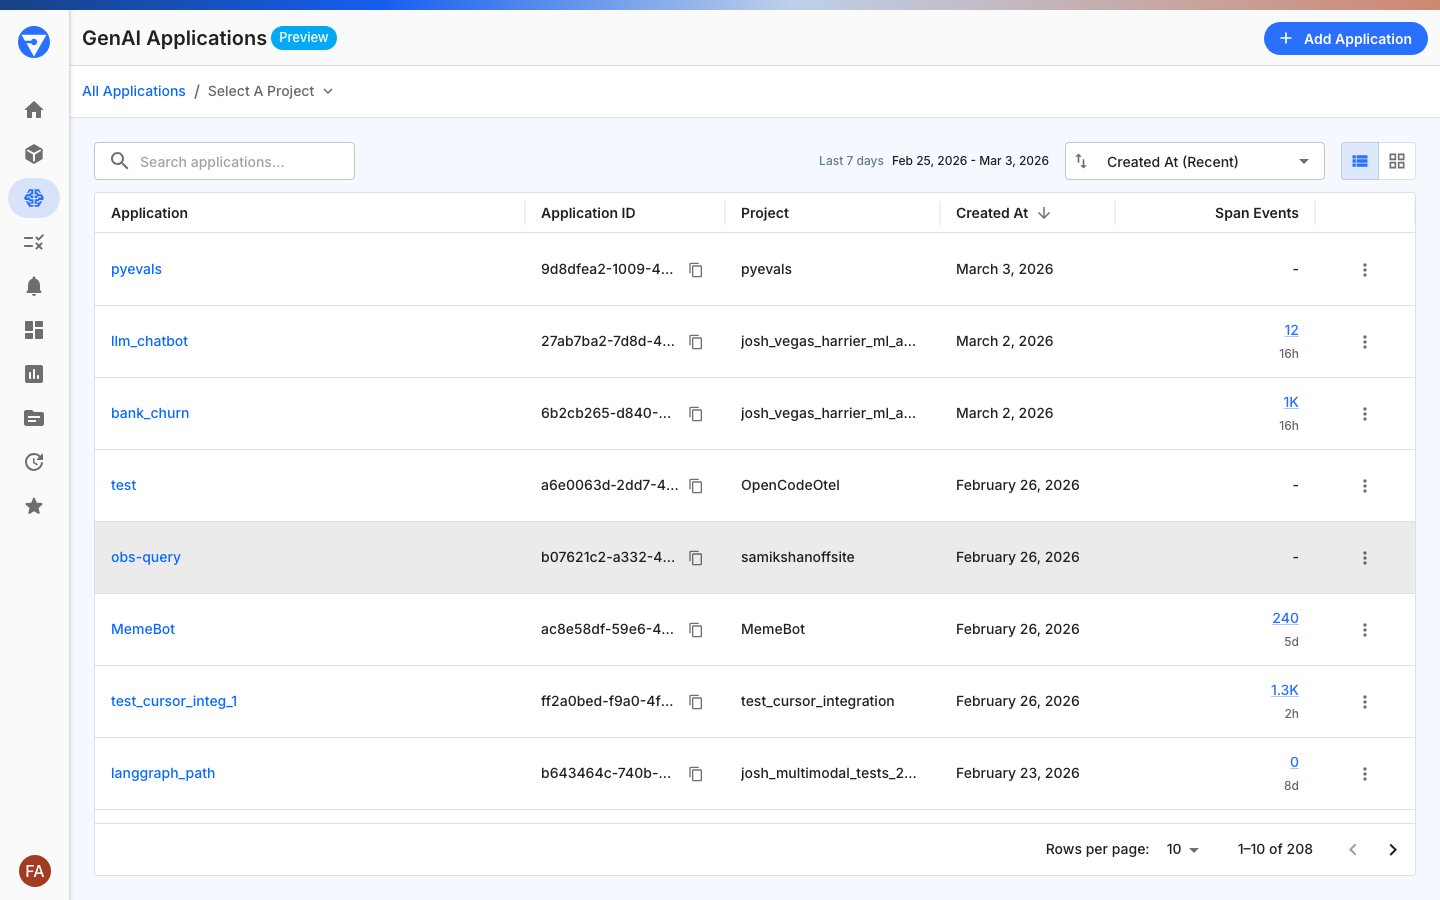
- Navigate to GenAI Applications in the left sidebar
- Click Add Application in the top-right corner
-
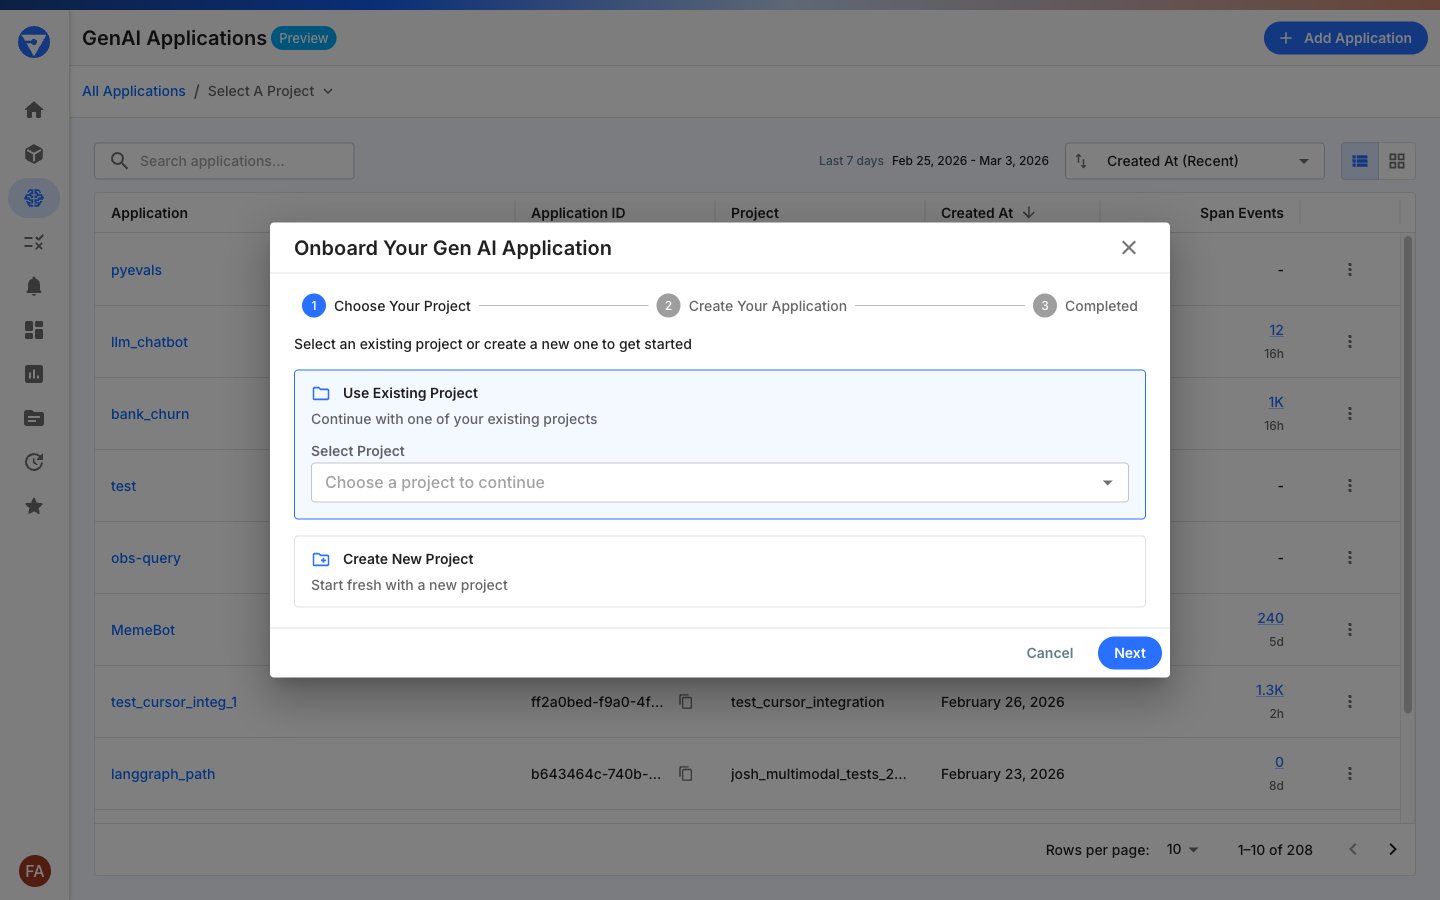
Select how to organize your new application:
Option 1: Use Existing Project
- Select Use Existing Project
- Choose a project from the dropdown menu
- Review current team members, add or remove members, or change roles
- Select Create New Project
- (Optional) Add initial team members using the same process as above
- Click Next to continue
Tip: Choose project names that reflect your team structure or product areas (for example,
CustomerSupportChatbot or DataScienceTeamApps).Create Your Application
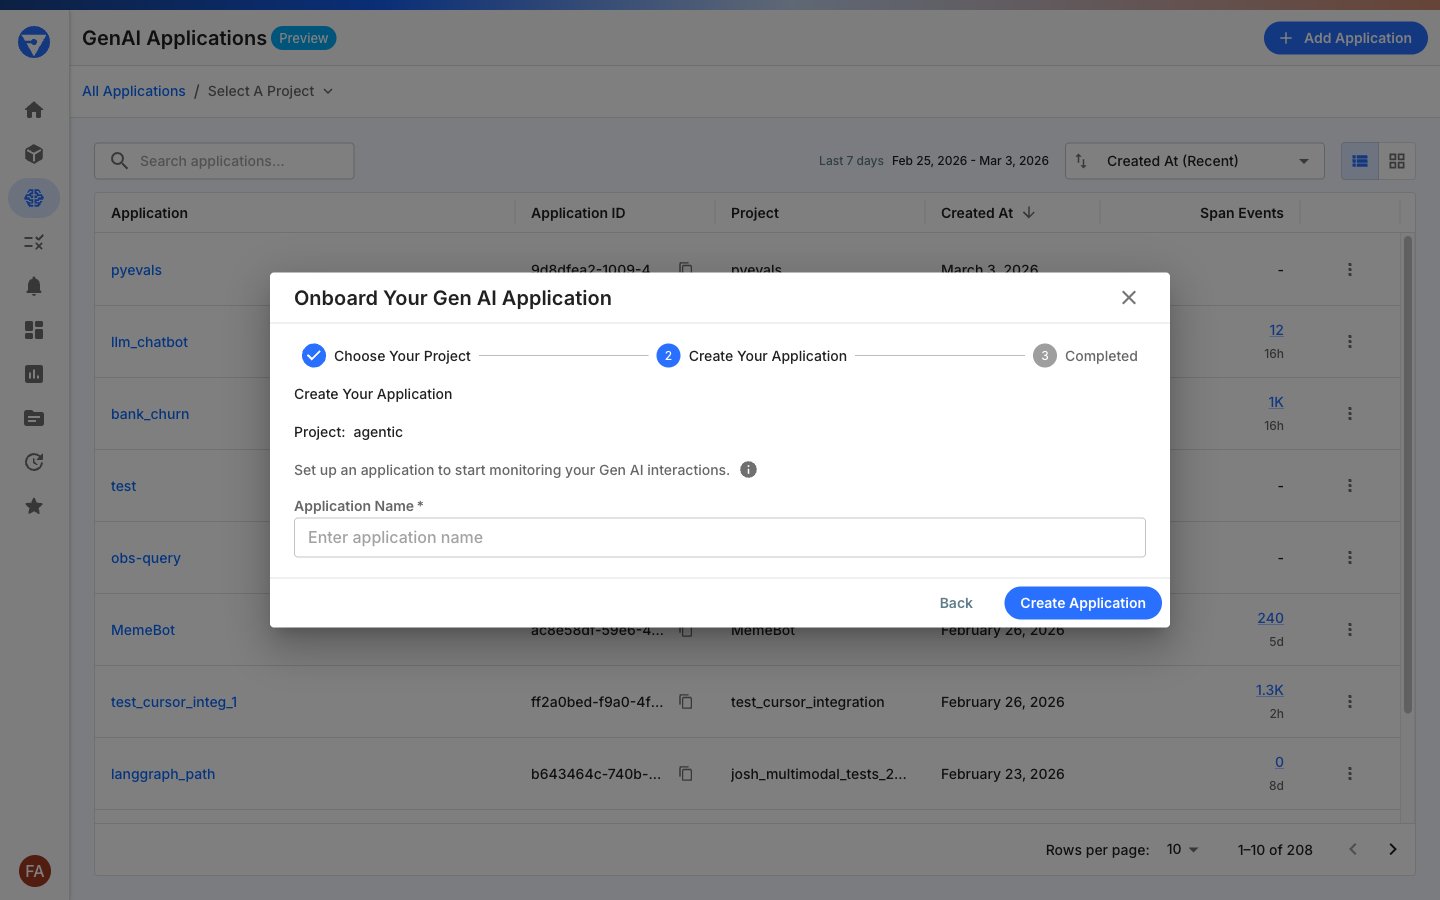
- In the Create Your Application step:
- Review the selected project name displayed at the top
- Enter an Application Name in the text field
- The name should uniquely identify the GenAI system you’re monitoring
- Click Create Application to continue
Note: Application names must be unique within the project. Choose names that clearly identify the specific use case (for example,
ContentSummarizer or CodeAssistant).Integrate Your Application
Once your application is created, you’ll see the Setup Complete! confirmation screen with your integration details.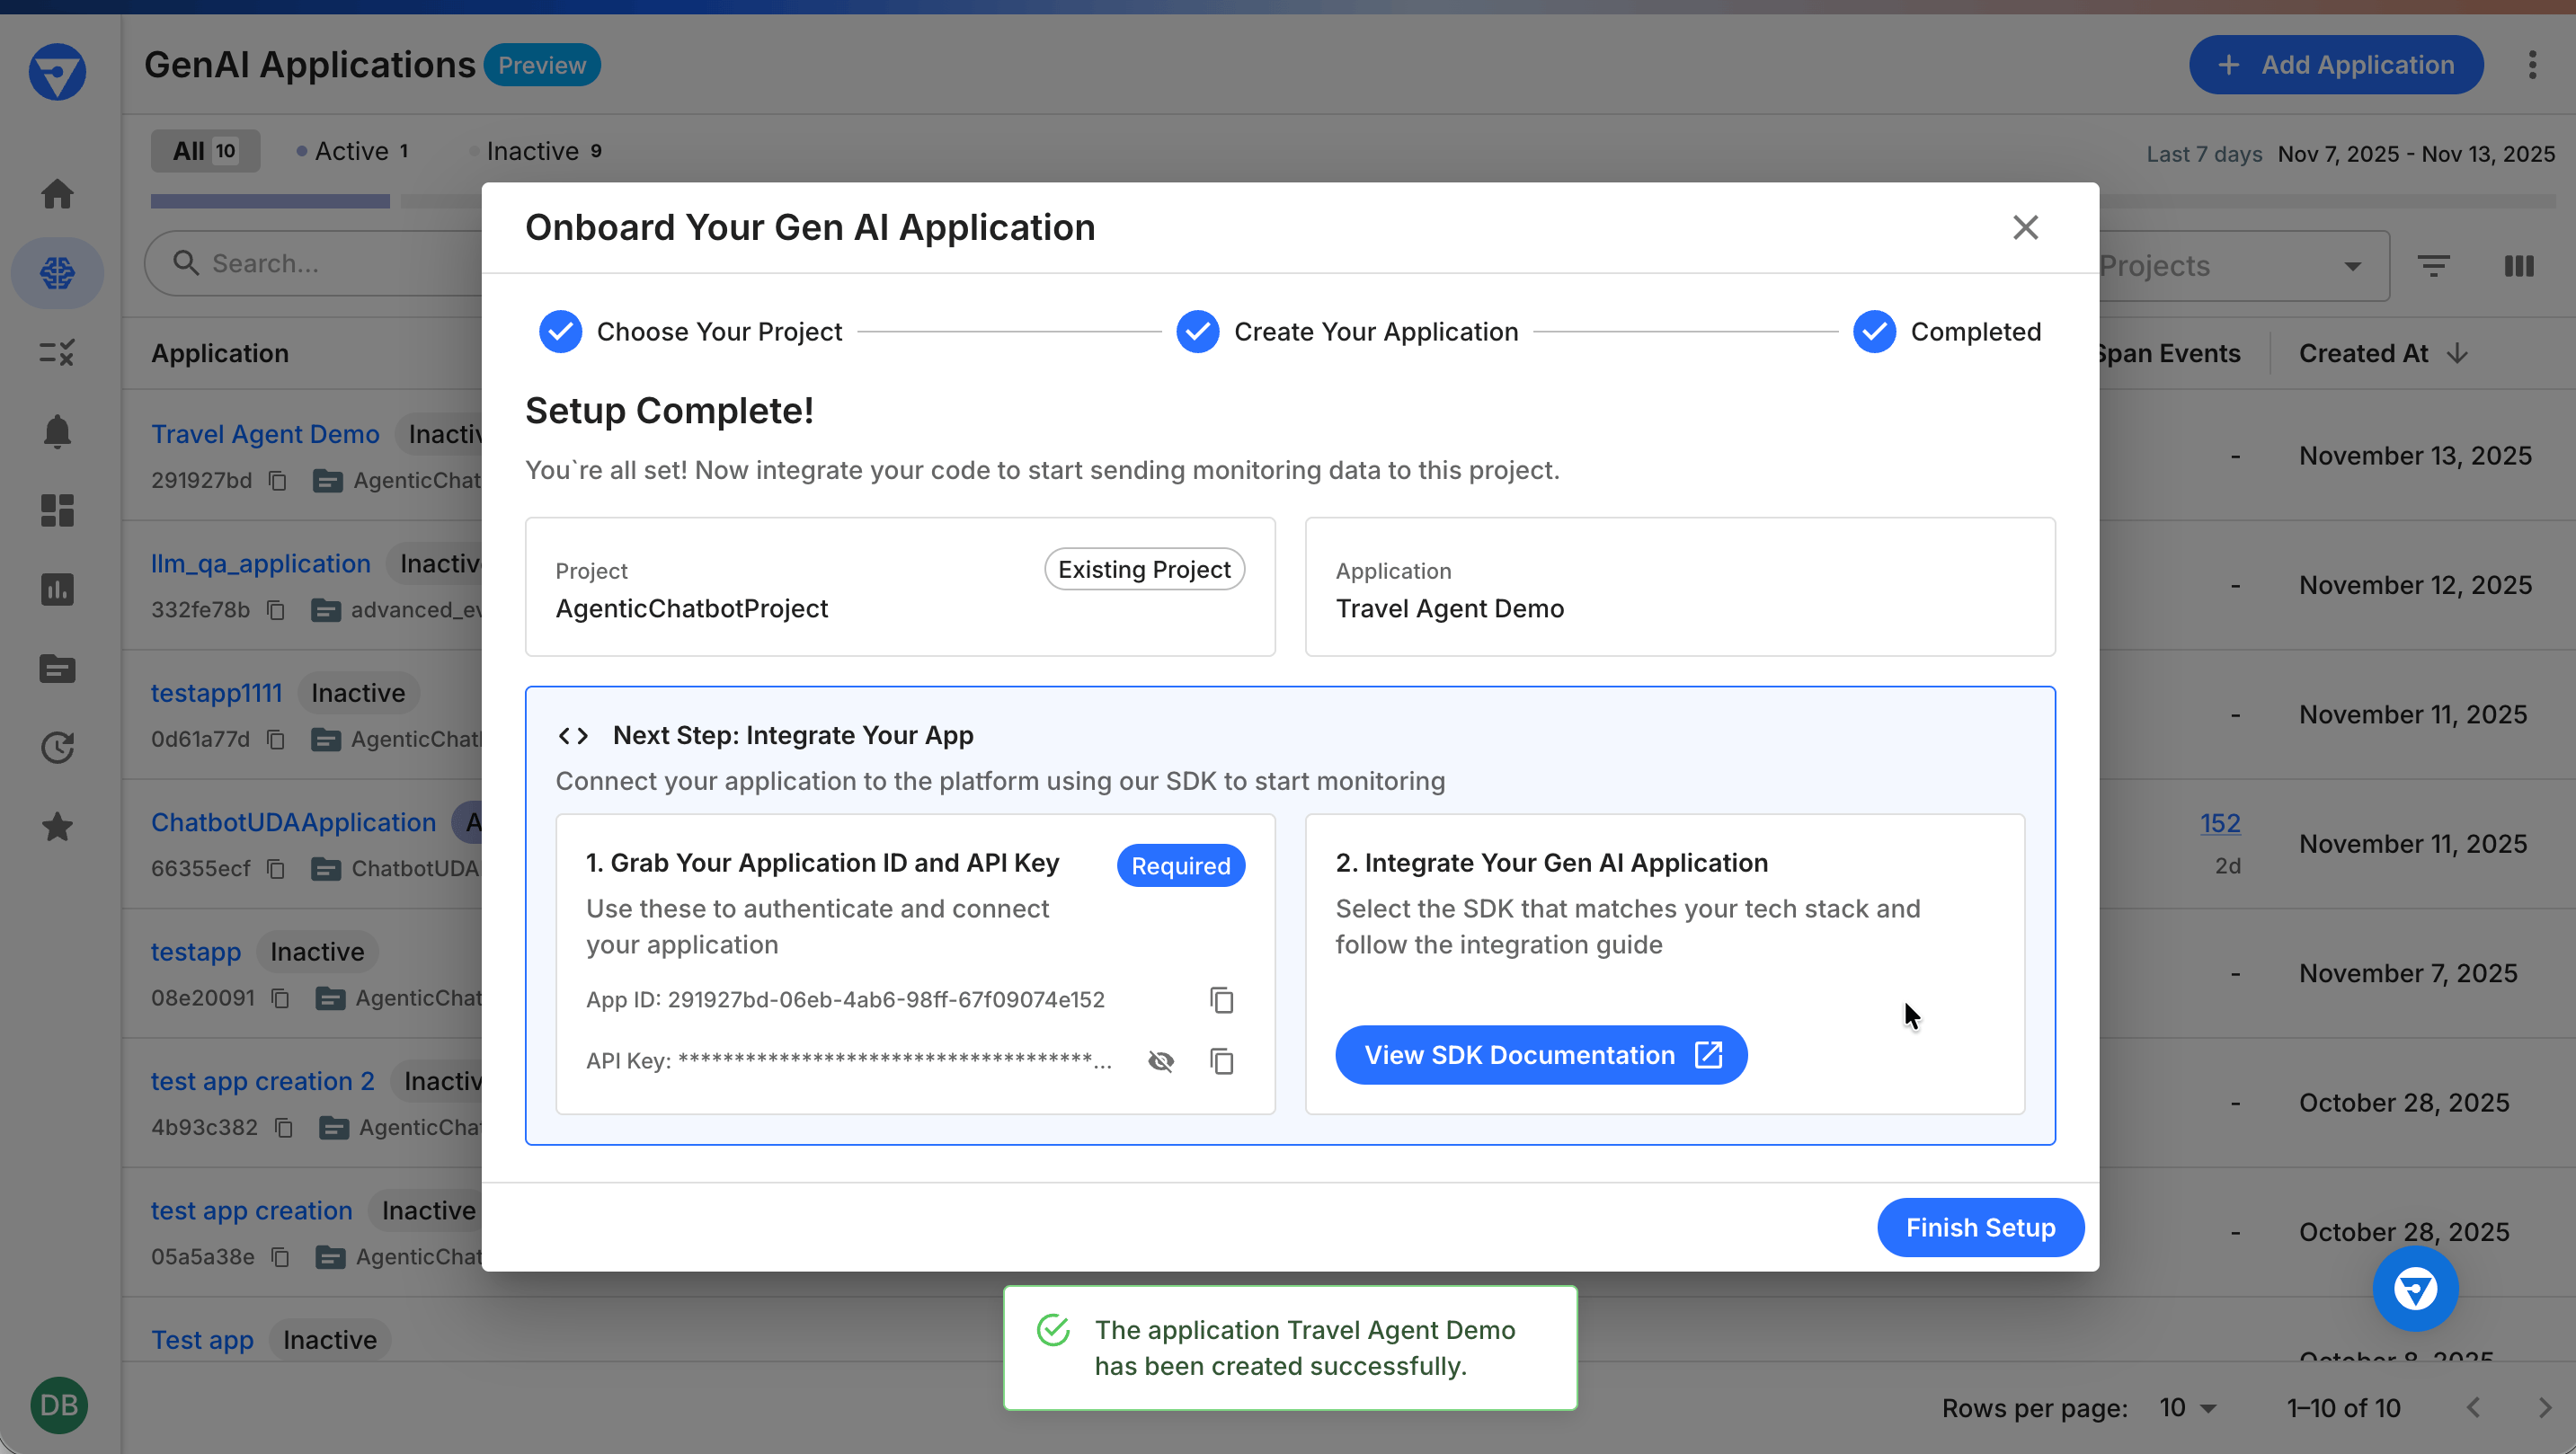
- Application ID - Uniquely identifies your application (UUID format)
- API Key - Authenticates requests from your code
- Locate the Grab Your Application ID and API Key section
- Copy the Application ID:
- Click the copy icon next to the Application ID field
- Store it securely—you’ll need it for SDK configuration
- Copy your API Key:
- Navigate to Settings → Credentials in Fiddler
- Copy your API key or create a new one
- See API Keys for details
Security Best PracticeTreat your API key like a password. Never commit it to version control or share it publicly. Use environment variables or secure credential management systems.
- Fiddler LangGraph SDK - For LangGraph and LangChain applications
- Fiddler Evals SDK - For custom experiments and testing workflows
- OpenTelemetry Integration - For custom instrumentation
- Install the Fiddler SDK in your application
- Configure authentication with your Application ID and API Key
- Instrument your code to send span events and metrics
- Verify data is flowing to Fiddler
- Click Finish Setup to close the onboarding dialog
Next Steps
Now that your application is onboarded, you can:Start Monitoring
- Publish Data - Run your instrumented application to send span events to Fiddler
- View Live Data - Navigate to your application to see real-time traces and metrics
- Analyze Performance - Use dashboards to track latency, throughput, and errors
Configure Monitoring
- Add Evaluators - Create custom evaluators to assess response quality
- Set Up Alerts - Configure alerts for anomalies or performance degradation
- Define Rules - Create business rules for content moderation or compliance
Scale Your Monitoring
- Add More Applications - Onboard additional GenAI systems under the same project
- Organize by Team - Create separate projects for different teams or products
- Manage Access - Use project-level permissions to control who can view and modify applications
Frequently Asked Questions
Can I change the project an application belongs to?
Can I change the project an application belongs to?
No, once an application is created within a project, it cannot be moved to another project. If you need to reorganize, you’ll need to create a new application in the correct project.
How many applications can I have in a project?
How many applications can I have in a project?
There is no hard limit on the number of applications per project. However, for better organization, we recommend grouping related applications that share common team members or business context.
What happens if I delete a project?
What happens if I delete a project?
Deleting a project will remove all applications, monitoring data, and configurations within that project. This action cannot be undone. Ensure you export any data you need before deletion.
Can I use the same Application ID for multiple environments?
Can I use the same Application ID for multiple environments?
No, each application instance (development, staging, production) should have its own Application ID. This allows you to monitor each environment separately and apply different configurations or alerts.
Where do I find my API key?
Where do I find my API key?
Your API key is available in Settings → Credentials. See Creating API Keys for step-by-step instructions.
Related Documentation
Fiddler LangGraph SDK Quick Start
Instrument LangGraph applications in 10 minutes.
Fiddler Evals SDK
Run experiments for your GenAI applications.
Project and Application Management
Understand project and application concepts.
Role-Based Access Control
Manage team permissions.
API Keys
Create and manage API keys.