Overview
The Settings page provides centralized management for your organization’s configuration, user access, and integrations. Access the Settings page from the left navigation bar in the Fiddler UI.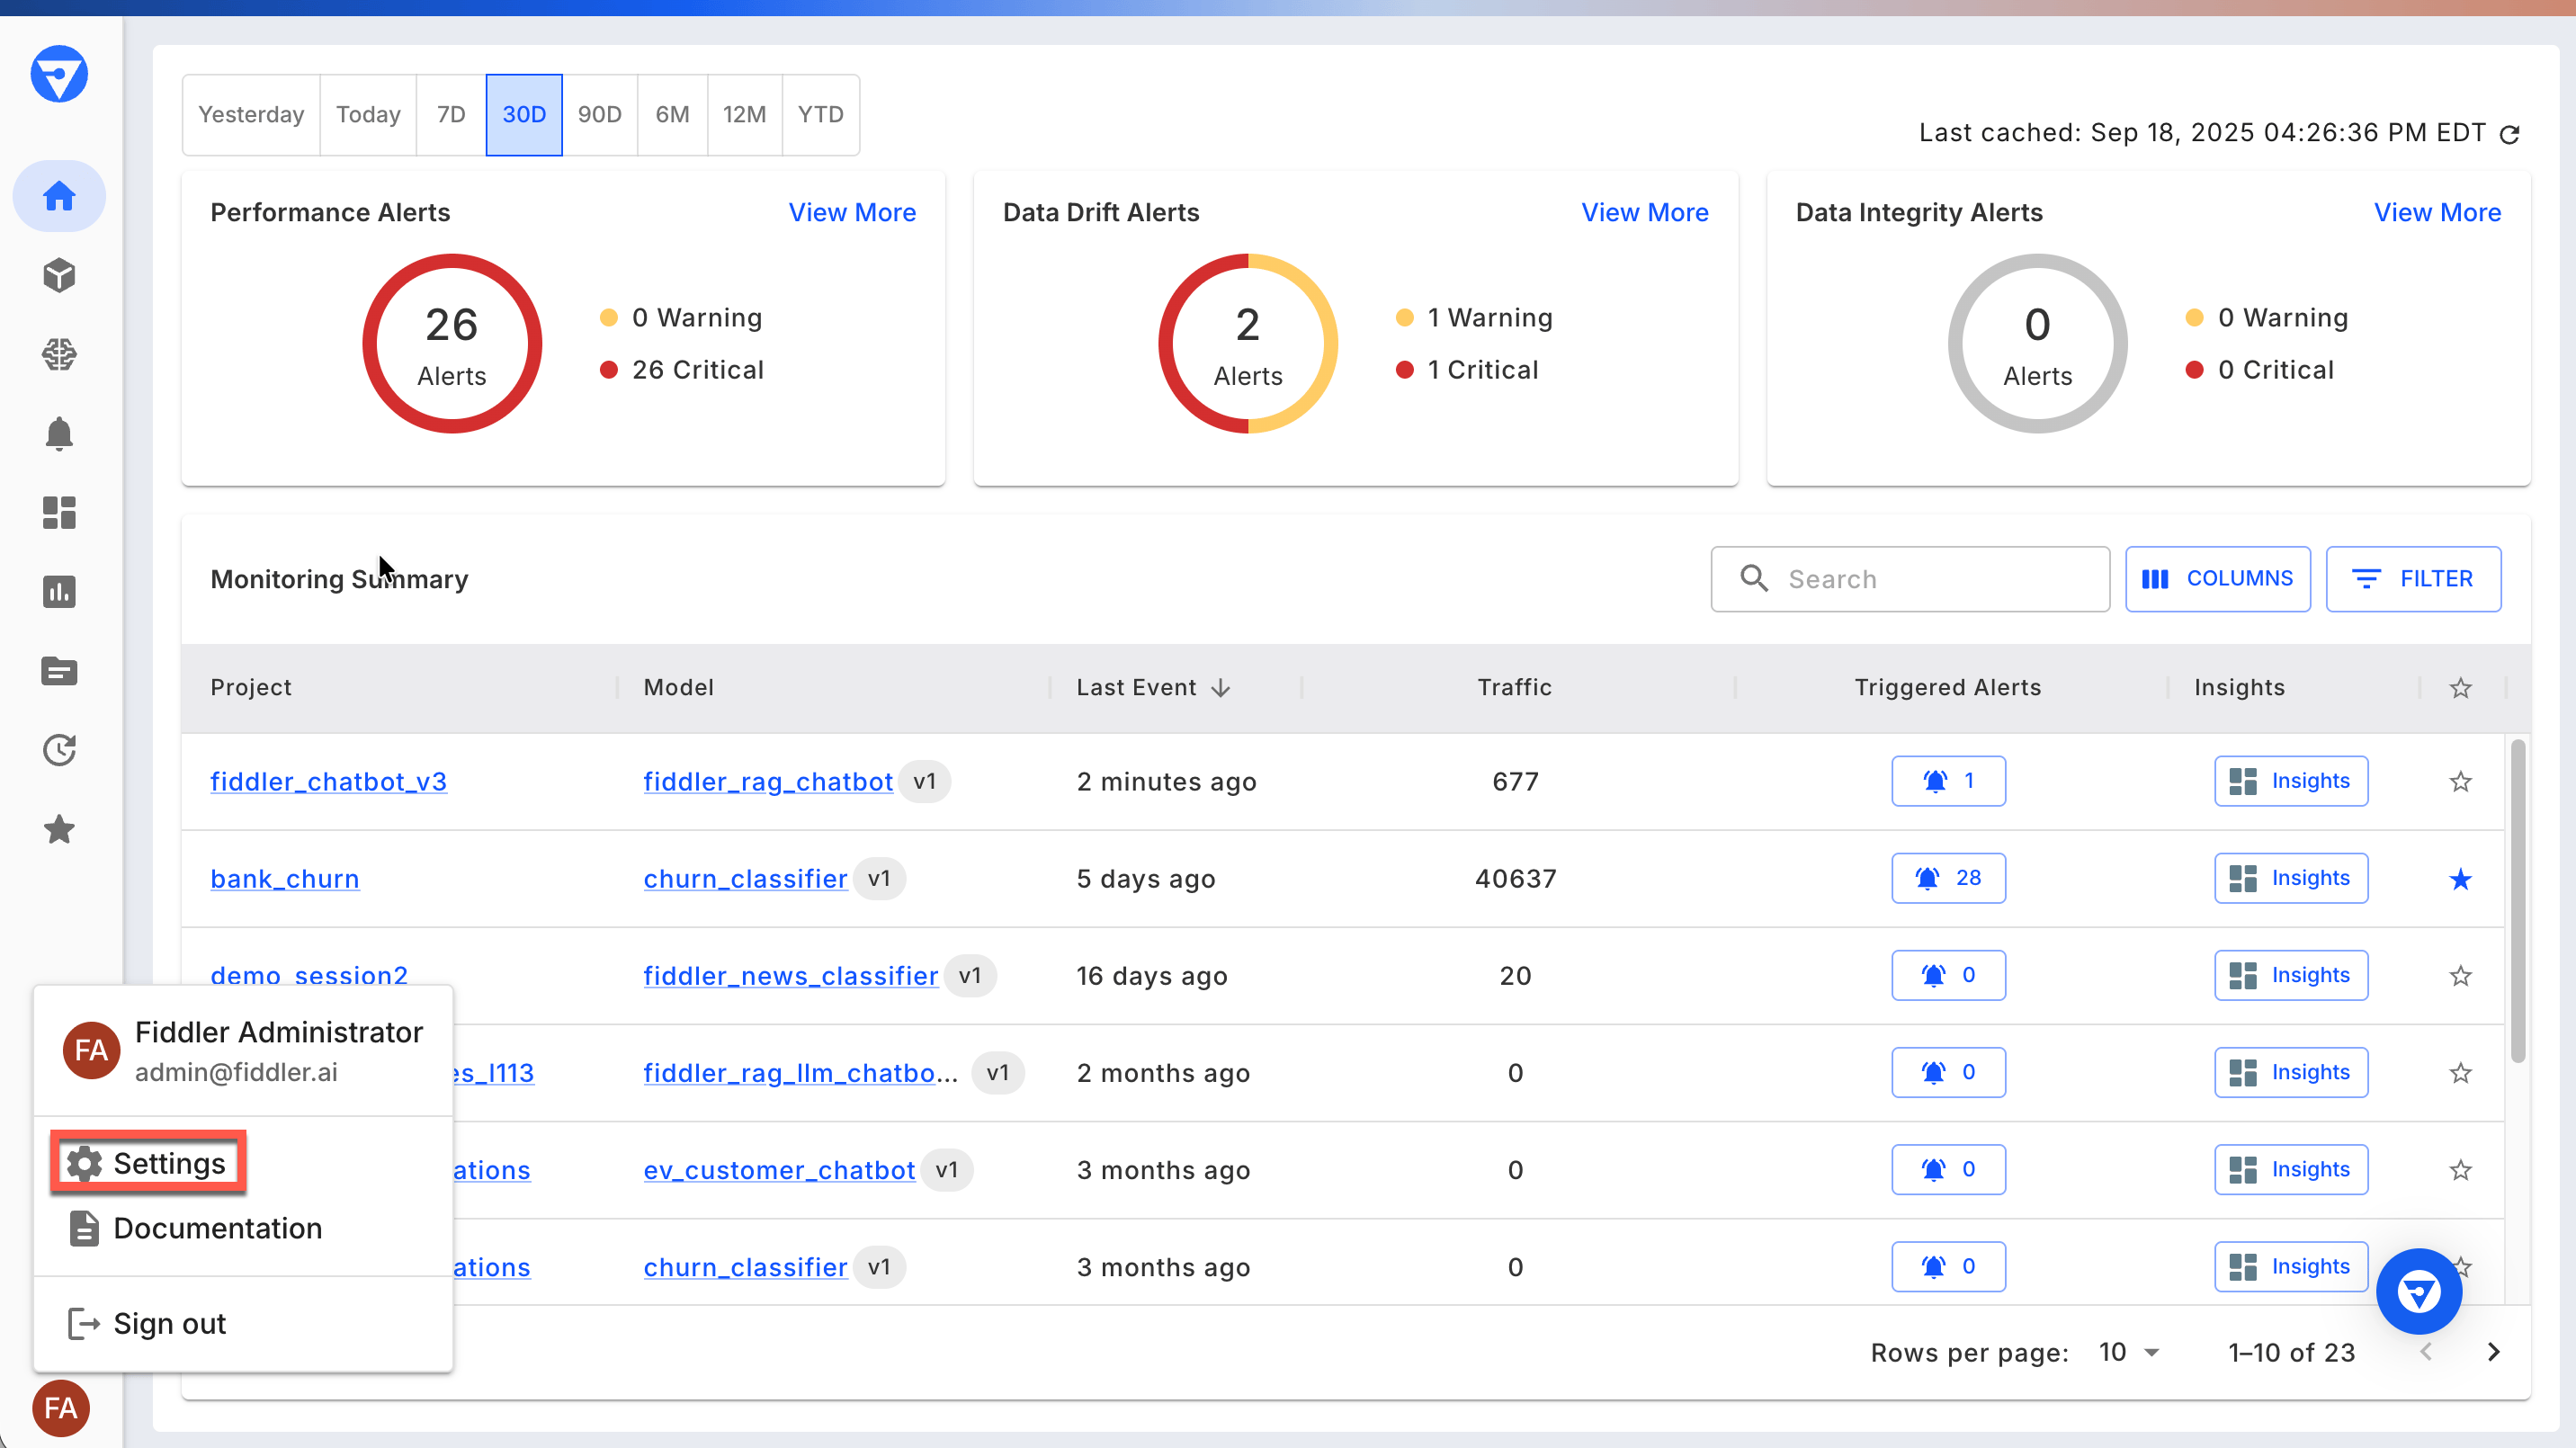
Settings Tabs
The Settings page is organized into the following tabs:- General - Organization information and user details
- Access - User and team management
- Credentials - API key management
- LLM Gateway - LLM provider and API credential management
- Email Configuration - Email notification settings
- PagerDuty Integration - PagerDuty alert configuration
- Webhook Integration - Webhook service management
General
The General tab displays your organization’s configuration and current user information.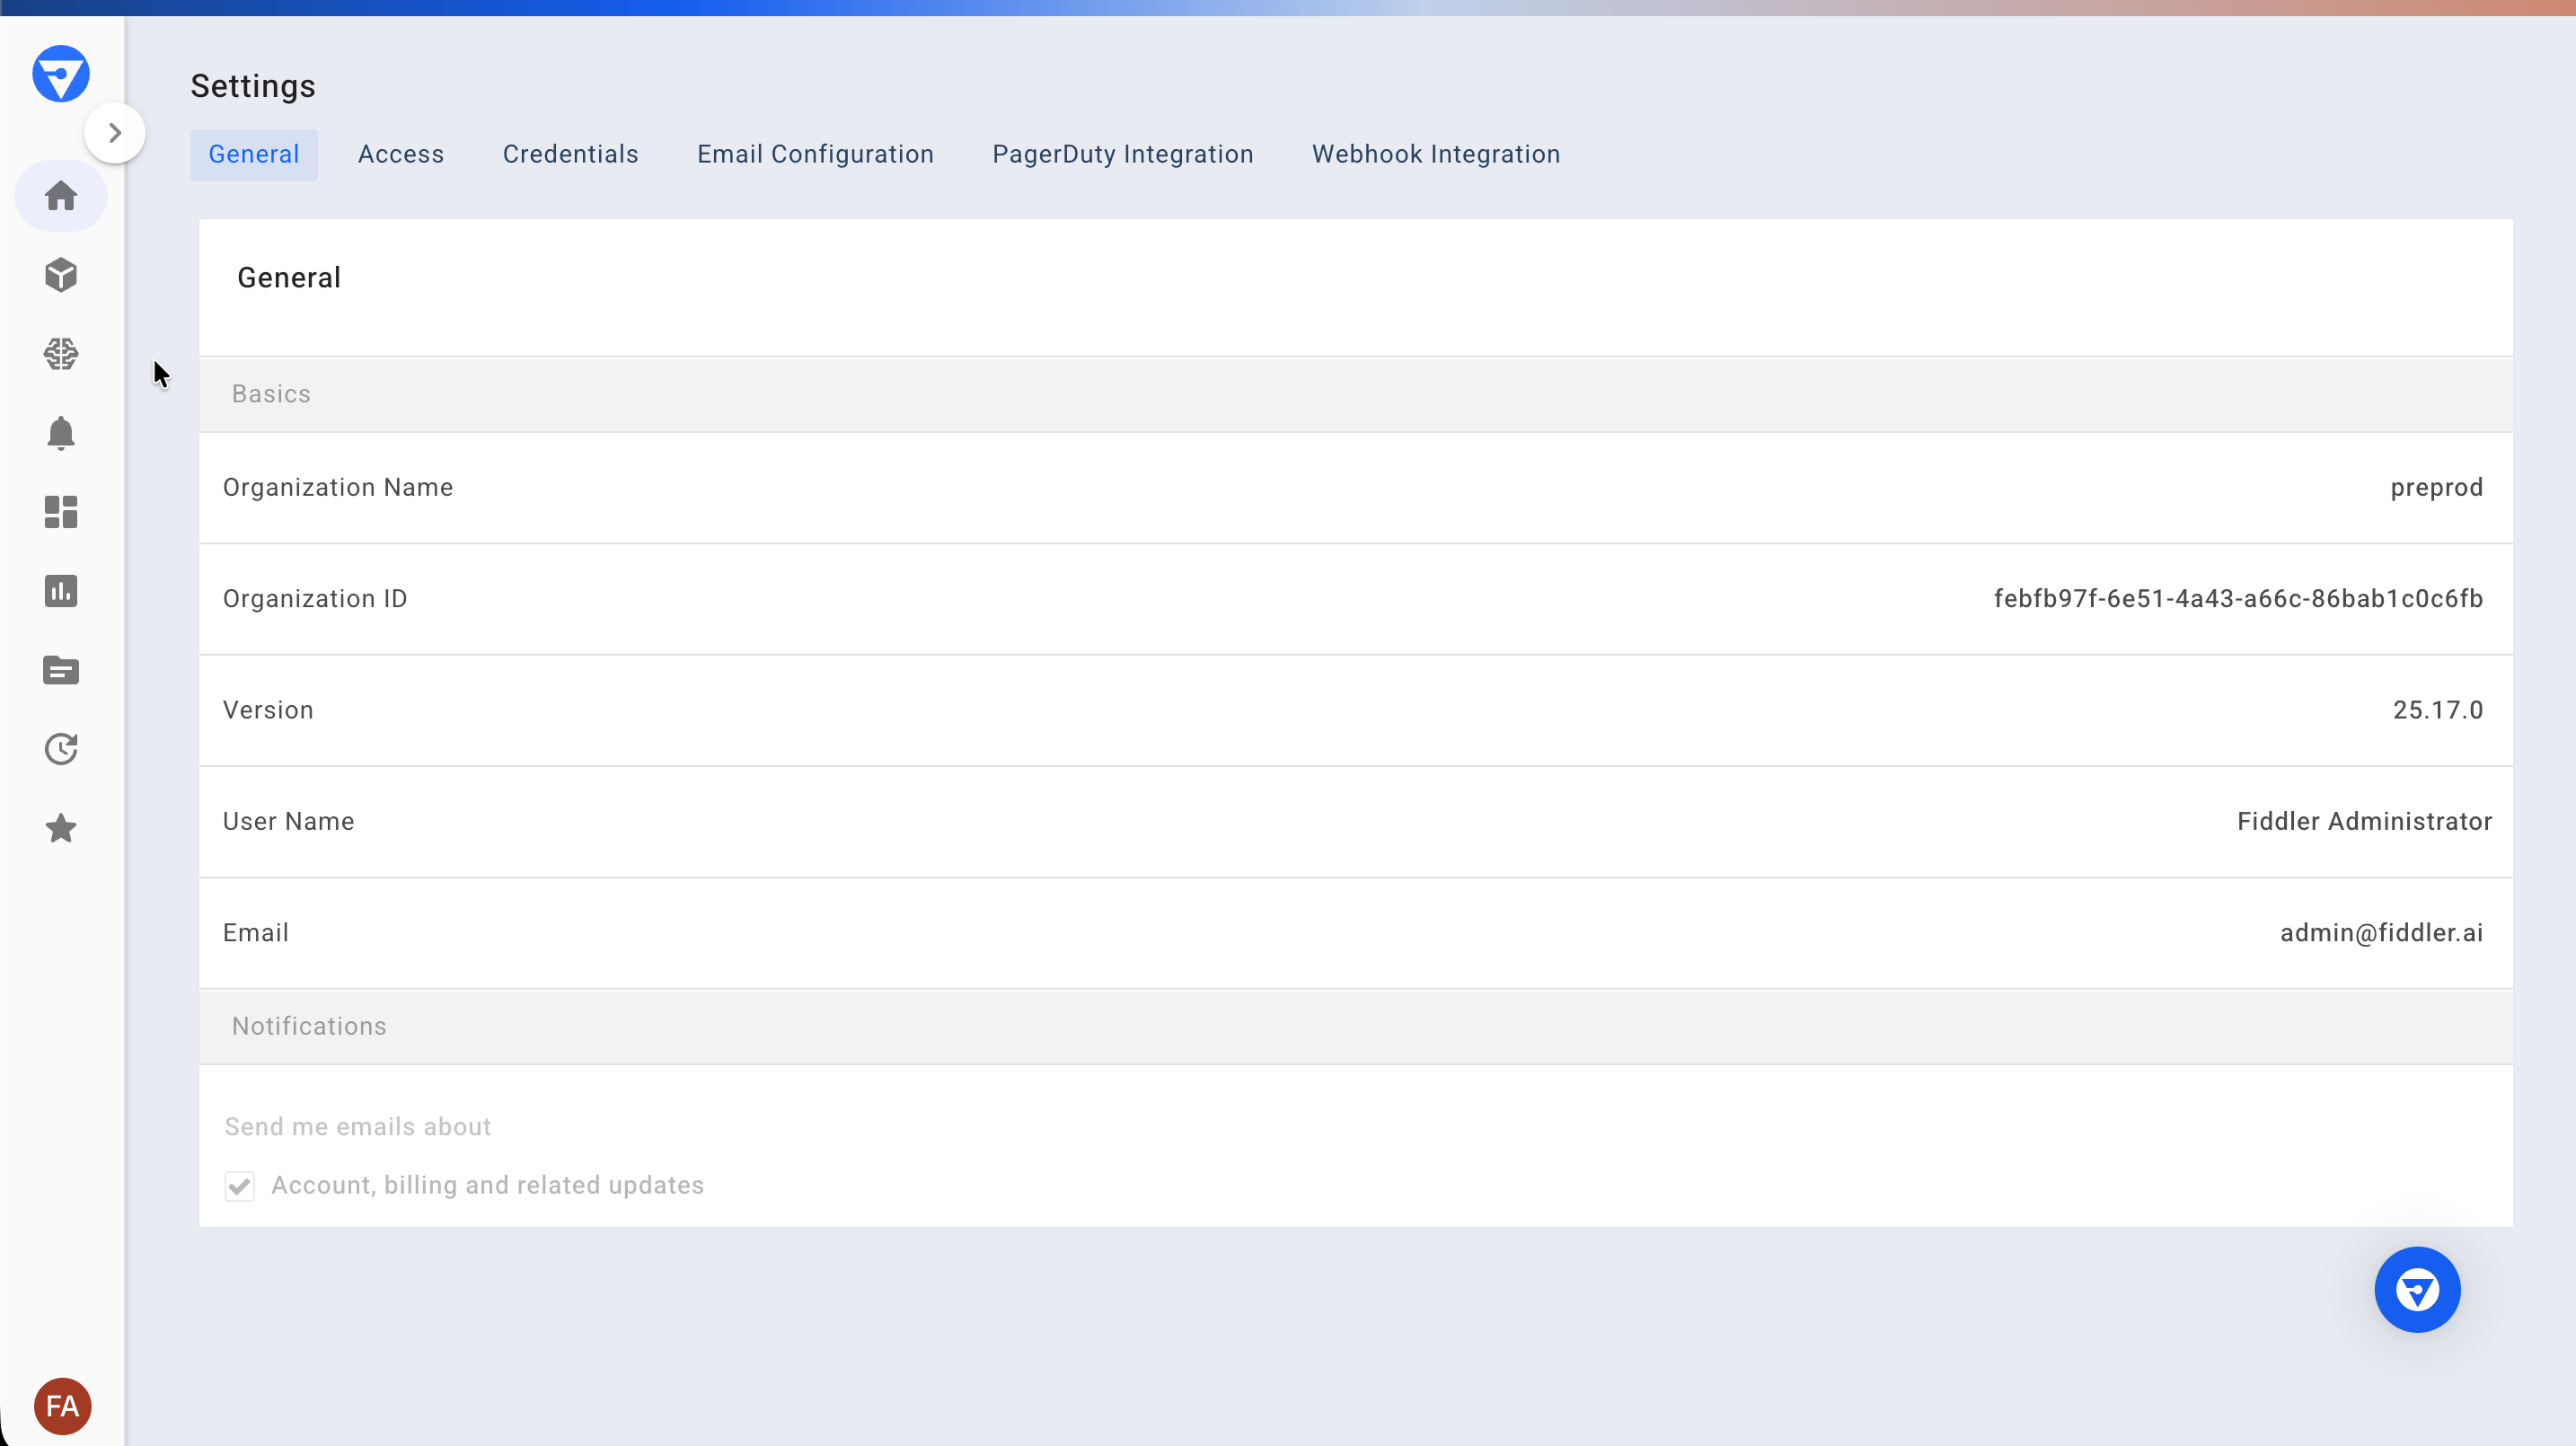
Organization Information
- Organization Name - Your organization’s display name in Fiddler
- Organization ID - Unique identifier for your organization
- Version - Current Fiddler platform version
User Information
- User Name - Your display name in the system
- Email - Email address associated with your account
Access
The Access tab provides centralized management for users and teams within your organization.Users
The Users sub-tab displays all users who are members of your organization.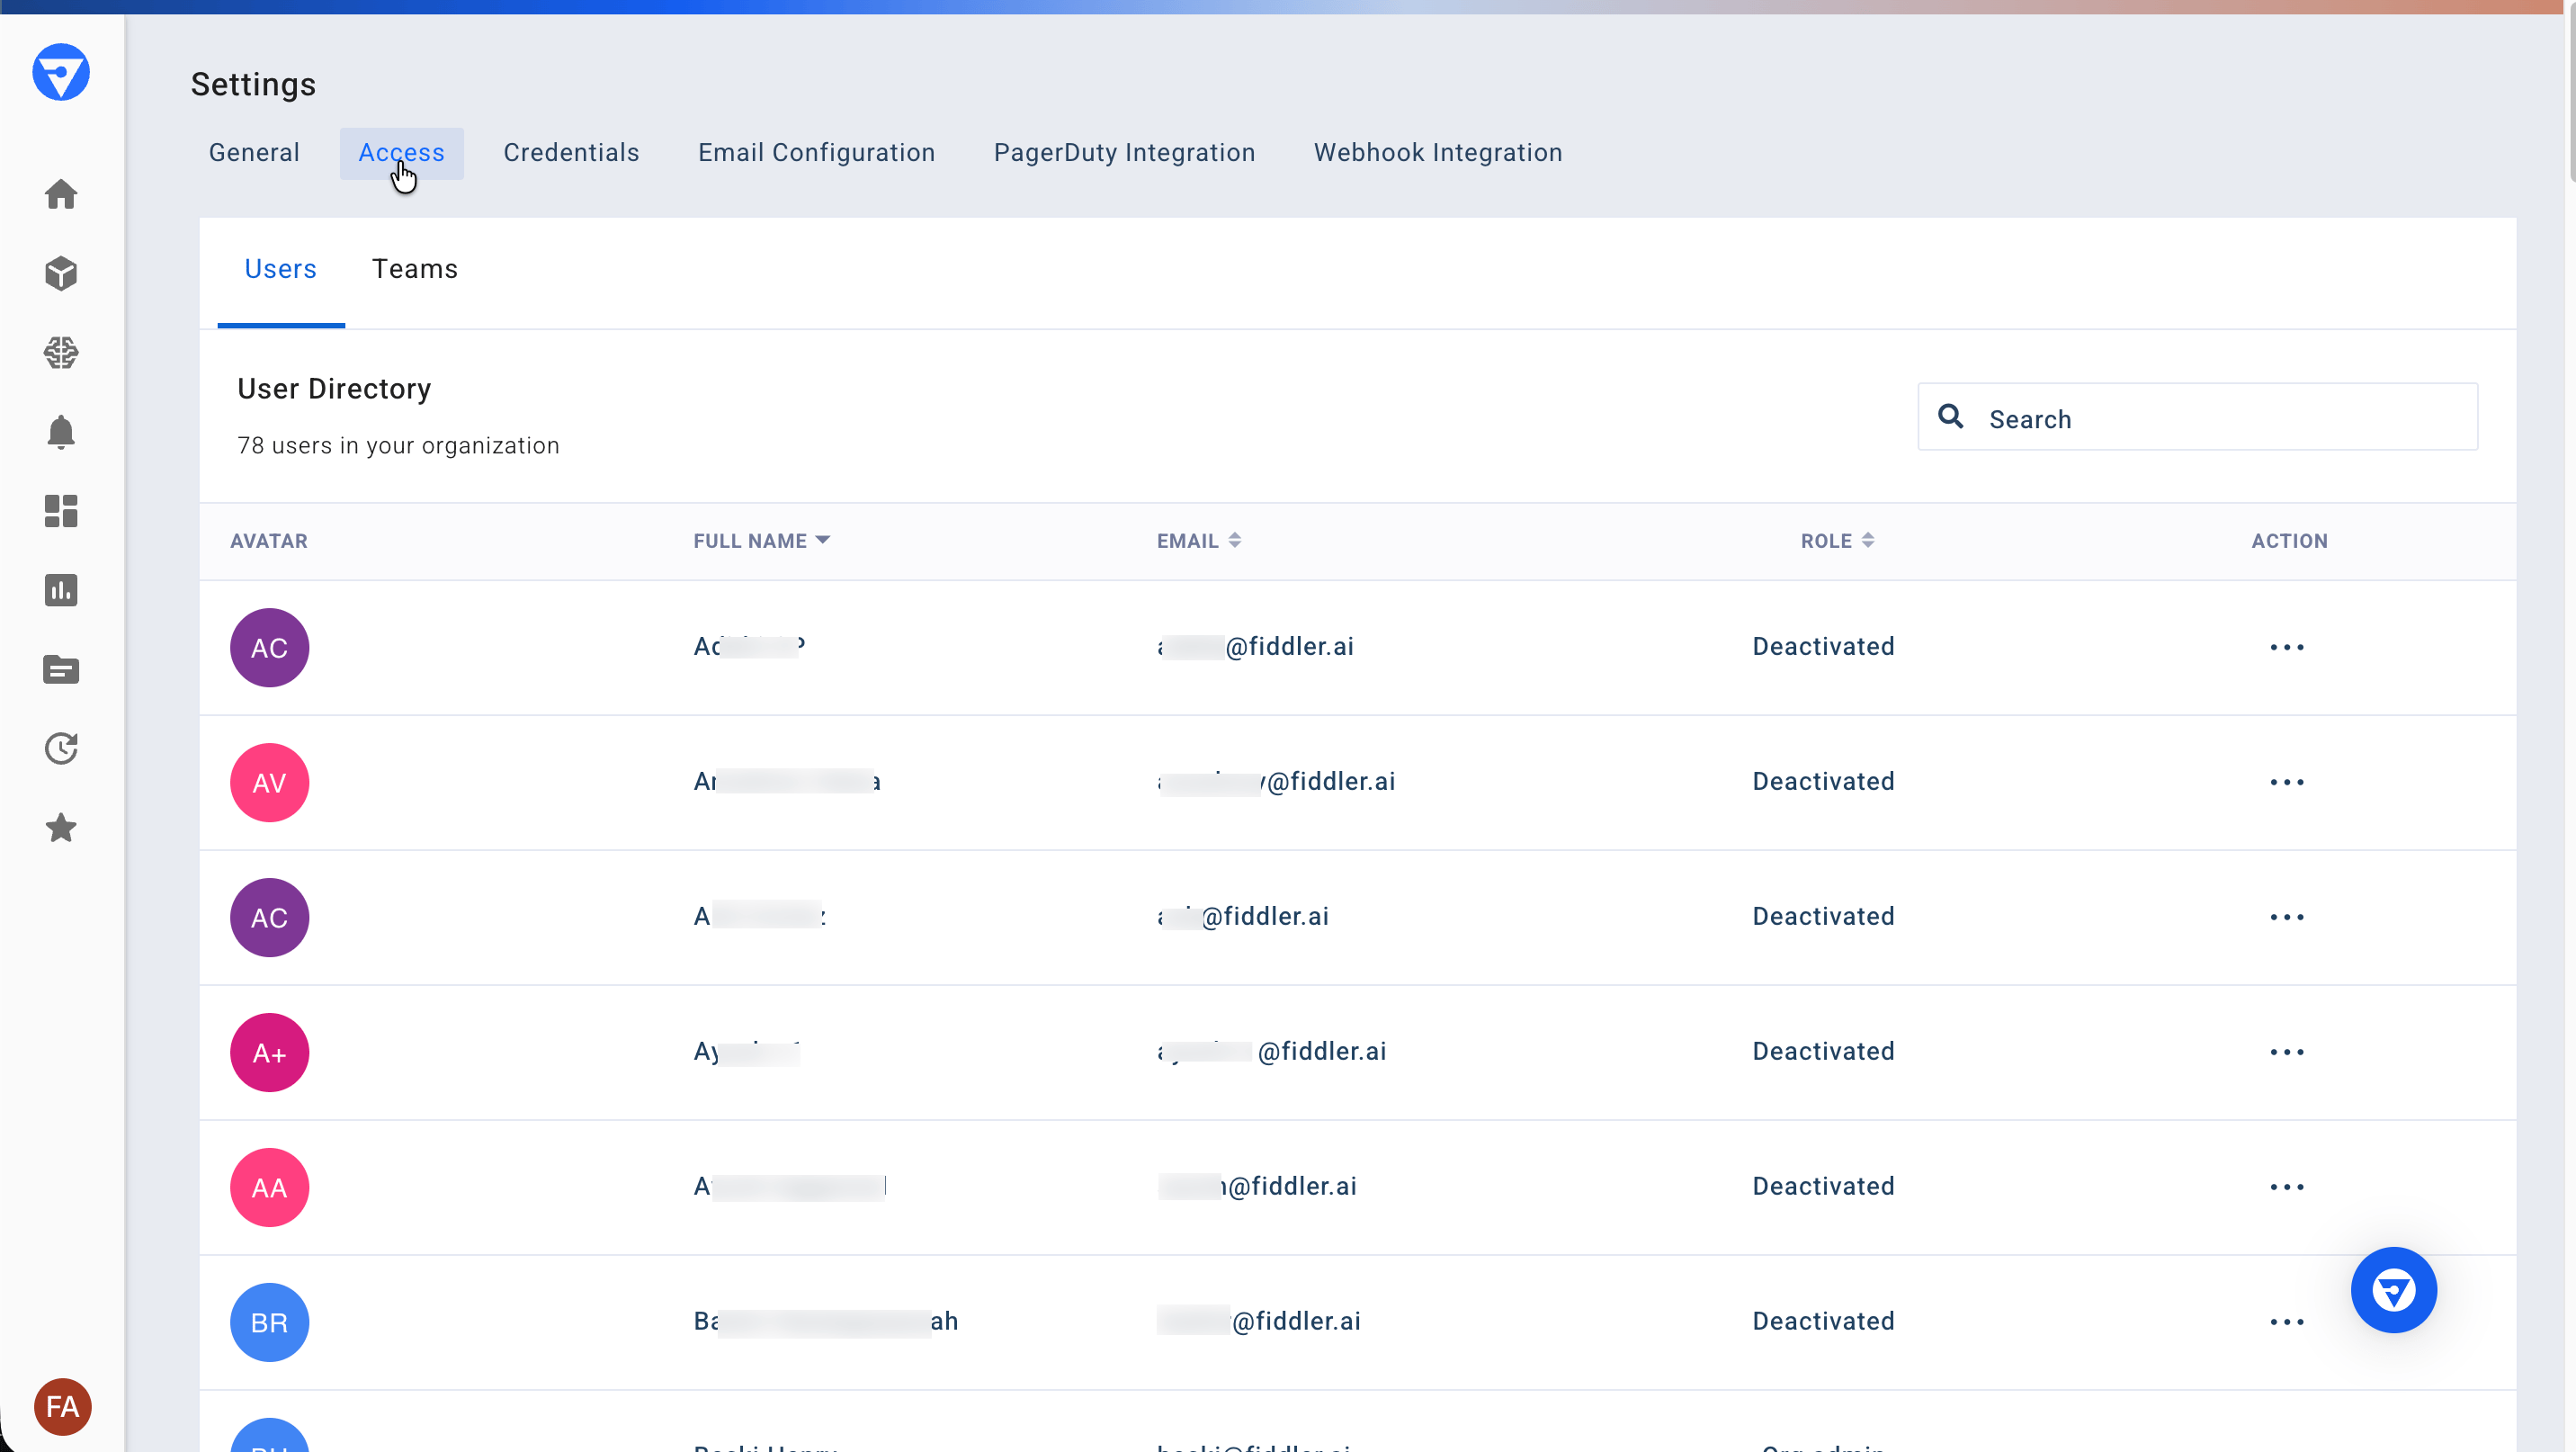
- User names and email addresses
- Organization roles (Org Admin or Org Member)
- Account status (Active/Inactive)
- Last login information
Note User invitations are managed through the Fiddler AuthN console:
- Email authentication users must be invited by AuthN Org Owners or Org User Managers
- SSO users are automatically created upon first login to Fiddler
Teams
The Teams sub-tab displays all teams defined within your organization. Teams provide a way to organize users and manage project-level access controls.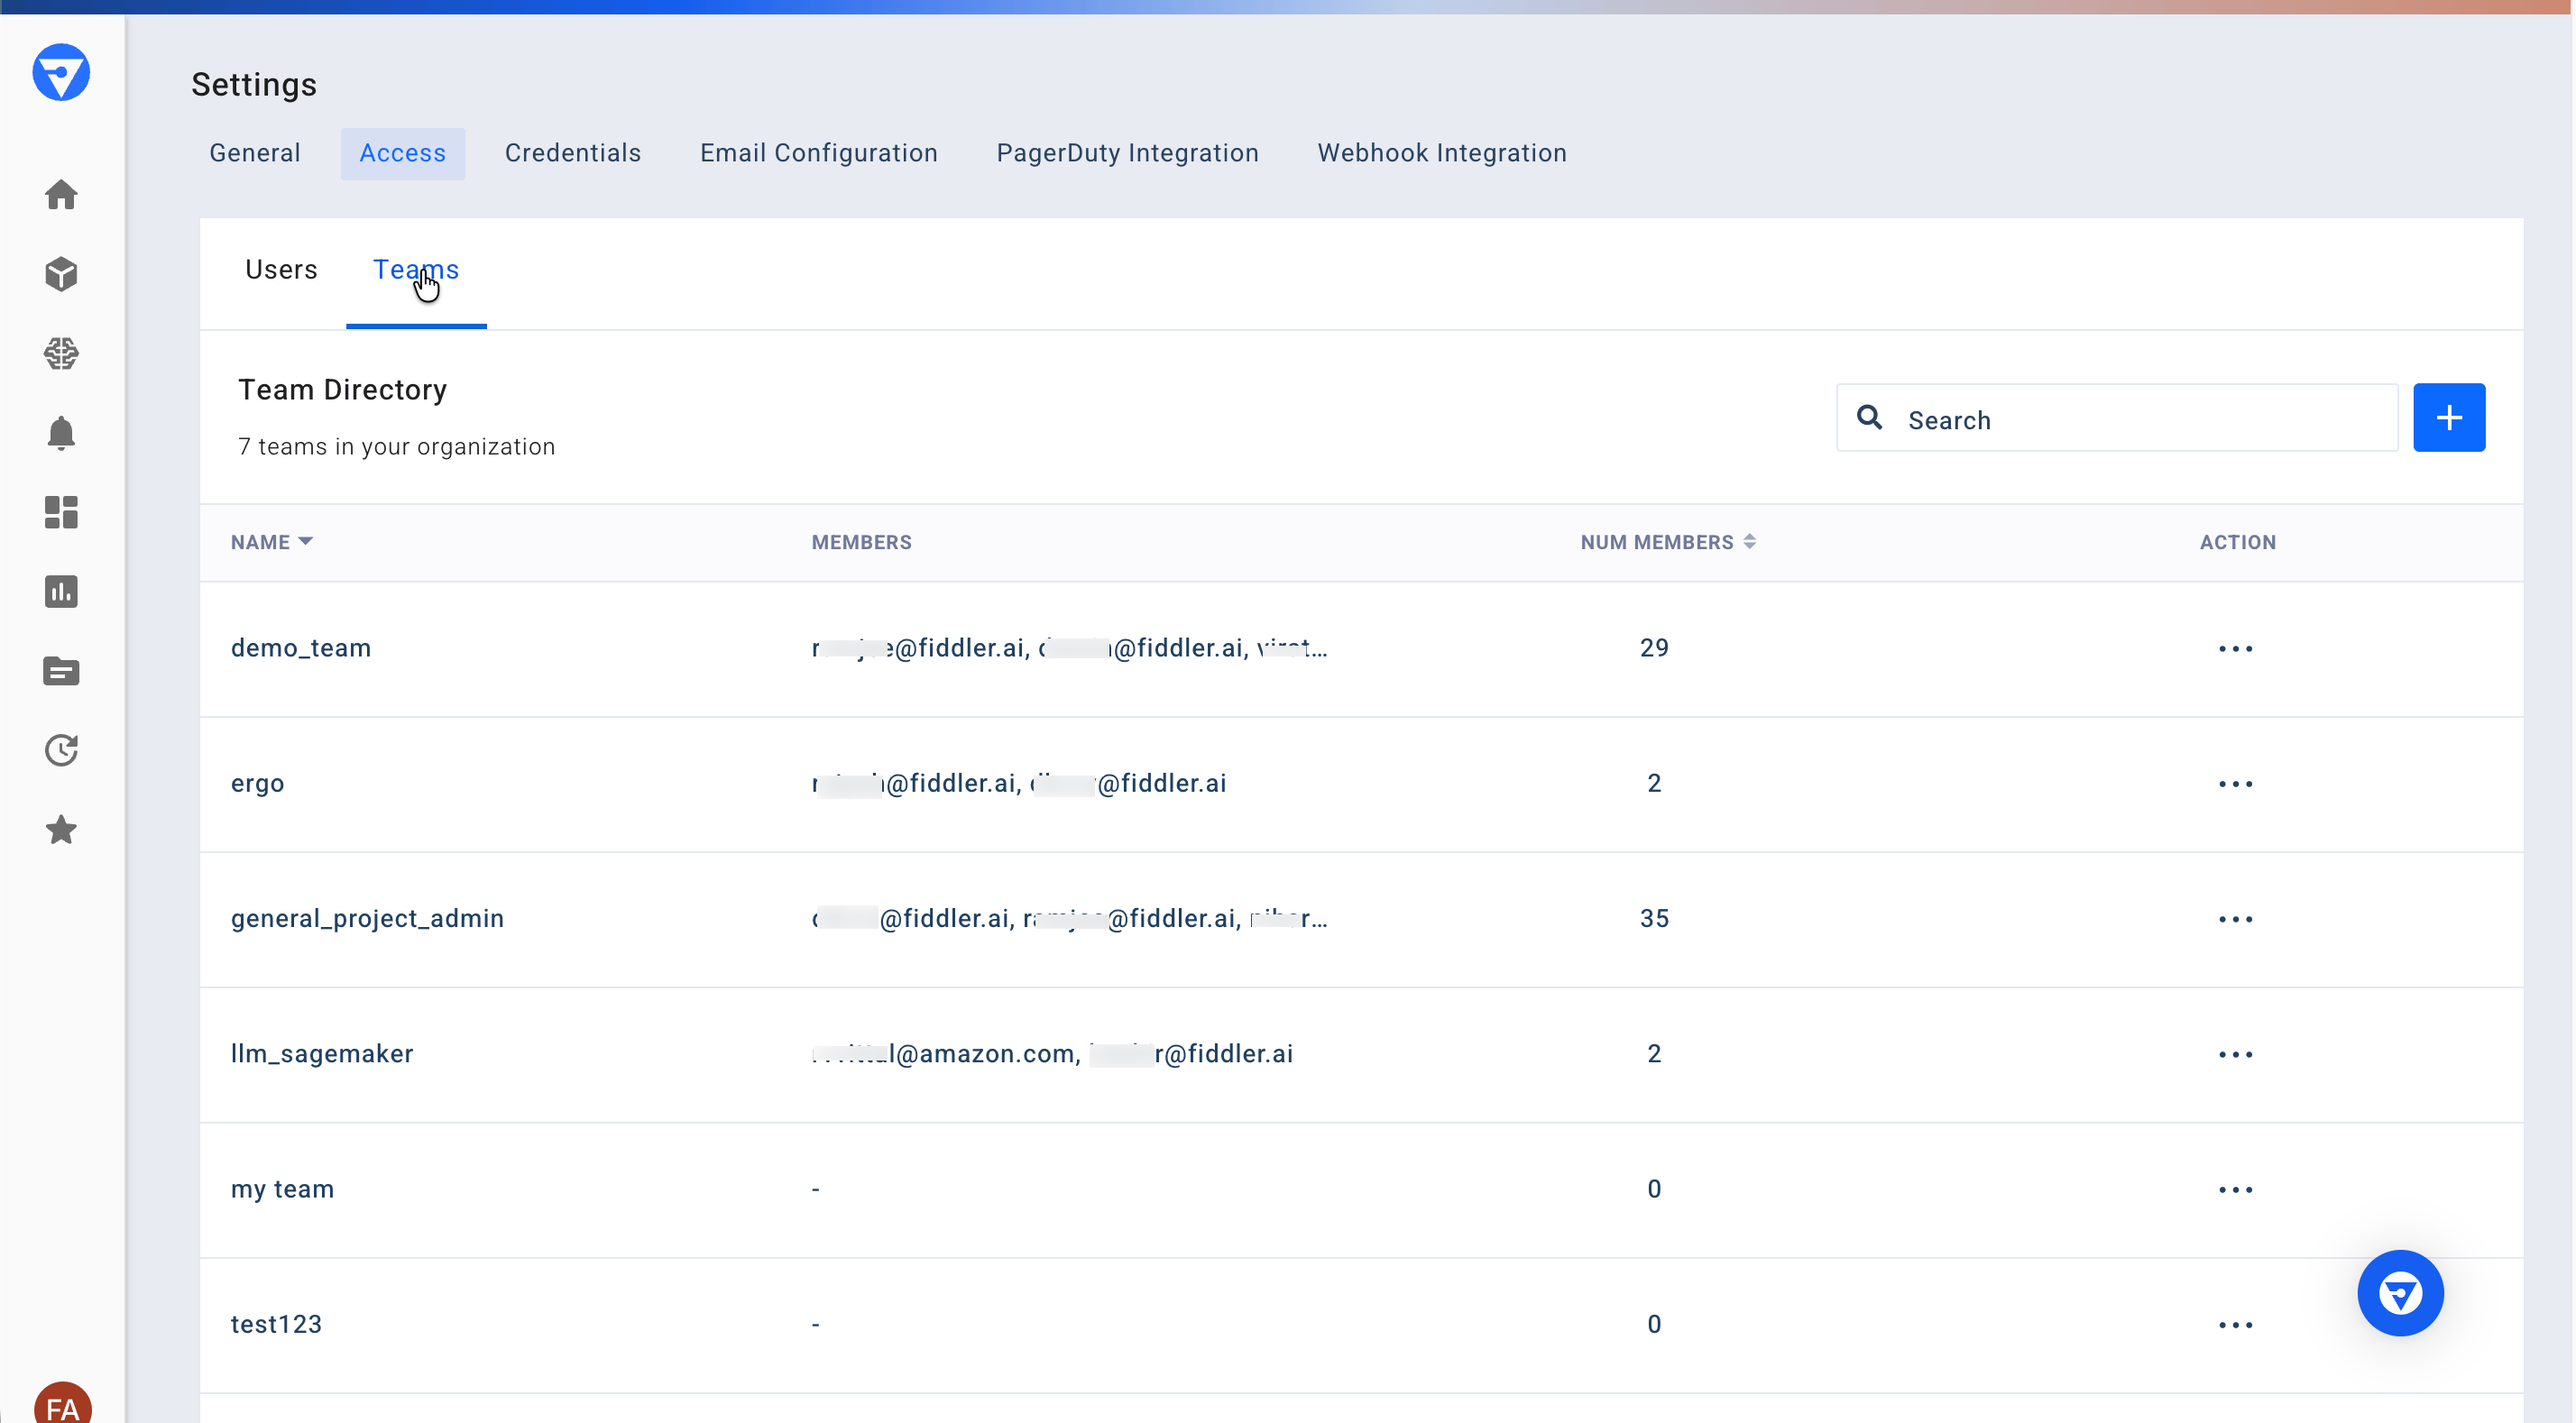
Creating Teams
Create a new team by clicking the plus (+) icon in the top-right corner.
Important
Only users with the Org Admin role can create teams. The plus (+) icon will not be visible for Org Members.
When creating a team:
- Enter a unique team name
- Team names may not include spaces, but mixed-case alphanumeric characters are valid
- Add team members from existing users
- Assign appropriate project permissions
- Click Create to save the team
Team Synchronization
If your organization uses SSO with group synchronization enabled, teams can be automatically created and managed based on your identity provider groups. See Mapping Identity Provider Groups to Fiddler Teams for configuration details.Credentials
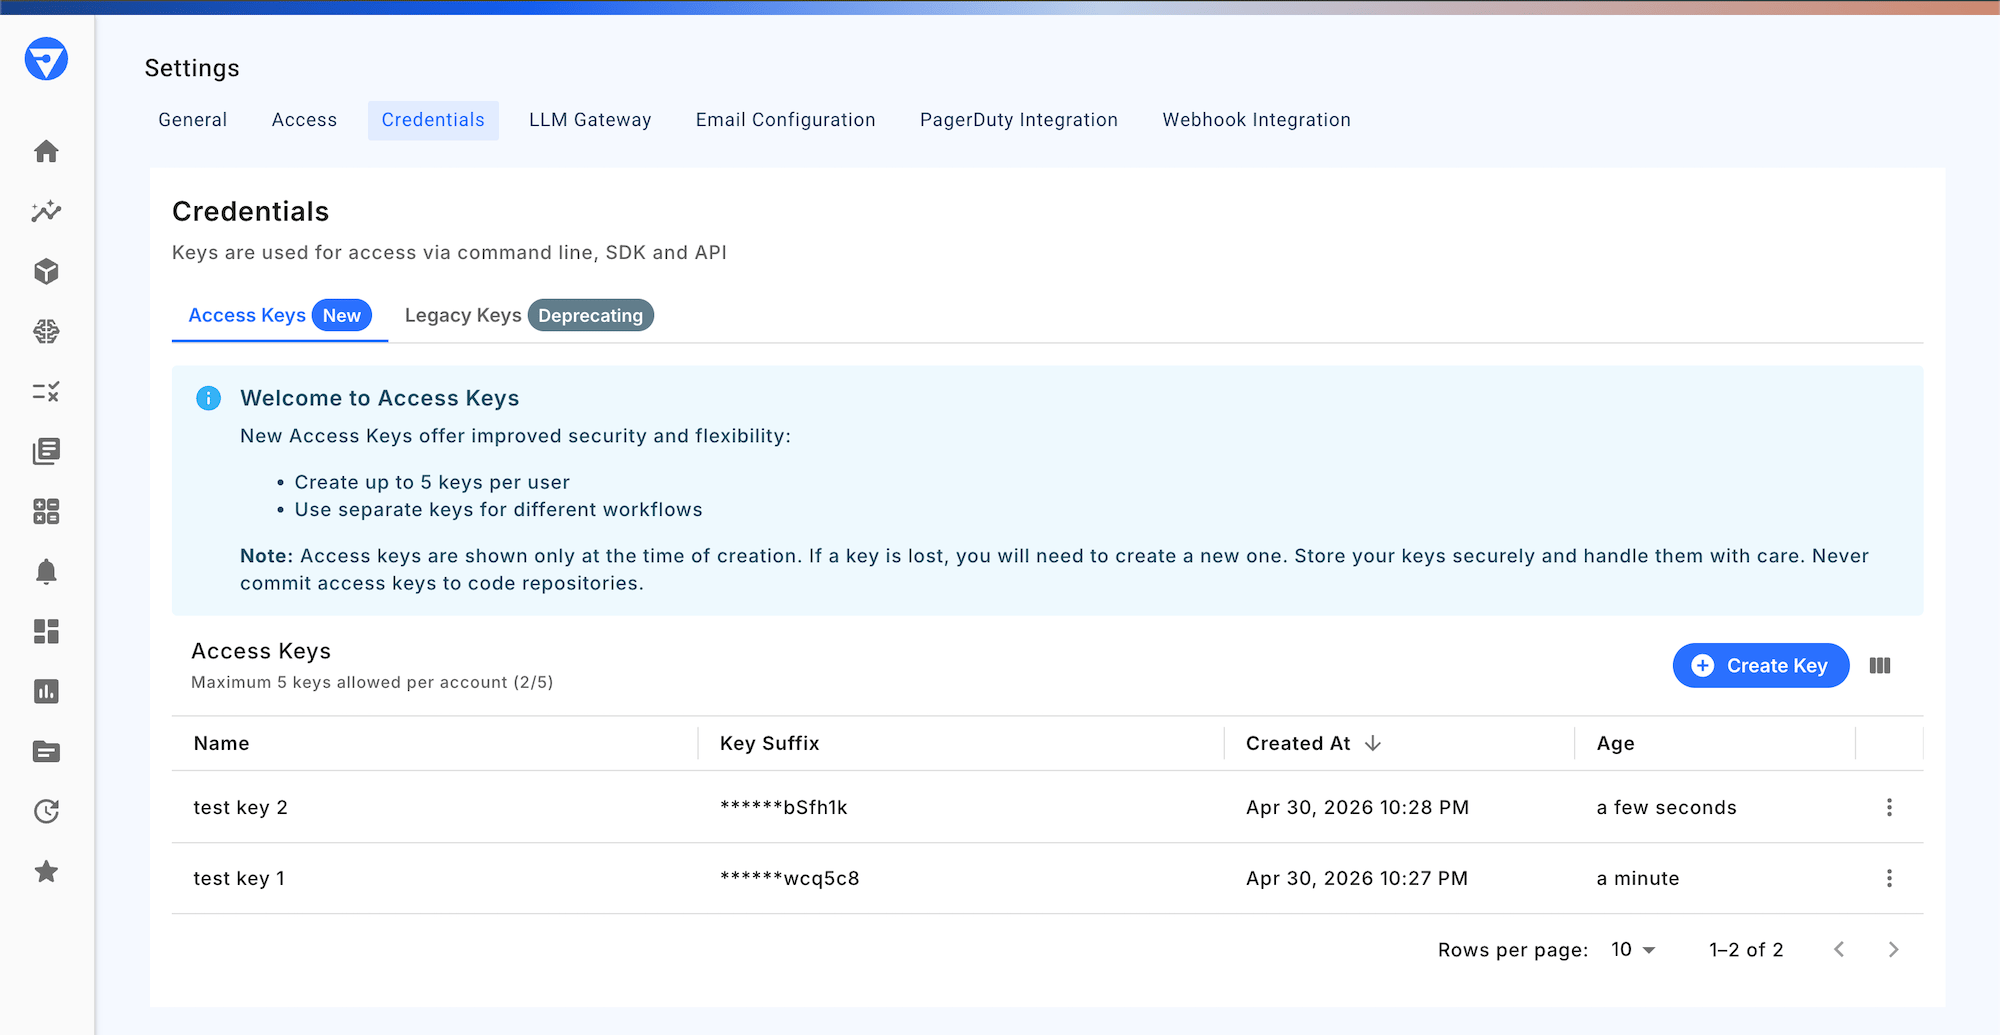
The Credentials tab manages API keys used for programmatic access to Fiddler through the Fiddler Python client, Fiddler SDKs, and REST APIs.Fiddler UI versions prior to 26.11 labeled API keys as Access Keys. Both terms refer to the same credential.
How API Keys Work
Fiddler API keys behave like Personal Access Tokens (PATs) — similar in model to a GitHub PAT. Each key is tied to the individual user who created it and acts on that user’s behalf, rather than identifying an application or service account. Understanding this model is important for security, access control, and key lifecycle management.Identity and Attribution
- Each API key is issued to a specific user and acts as that user when making API requests
- All actions performed with the key are attributed to the issuing user in audit logs
- Keys are not tied to a specific application, environment, or service account
Permission Scope
API keys inherit the full permissions of the user who created them:- There is no per-key scope reduction (for example, no read-only keys)
- There is no per-application or per-project restriction on a key
- If the user’s role changes, every key they own immediately reflects the new permissions
Lifetime and Revocation
- Keys remain active for as long as the issuing user’s account is active
- Keys persist until explicitly revoked — there is no automatic expiry
- If the user is deactivated, all of their keys stop working immediately
- User password changes have no effect on API keys
- Revoking a key takes effect immediately; allow up to 5 minutes for all active sessions to reflect the change
Anti-Patterns to Avoid
Because each key carries the issuing user’s full permissions and identity:- Do not share keys between team members — every action will be attributed to the key’s owner, and revoking access for one person requires revoking the shared key for everyone
- Do not commit keys to source control — treat them like passwords
- Prefer per-developer keys over a single shared key for any team or CI pipeline
- Rotate keys on personnel changes, suspected exposure, or on a regular schedule
What Fiddler API Keys Are Not
To set expectations against other common credential models:- Not OAuth client credentials — no client ID/secret pair, no token exchange
- Not service-account keys — no machine identity separate from a human user
- Not scoped tokens — no per-key permission reduction or resource restriction
Creating API Keys
Fiddler supports two key-creation flows. Named API keys are the recommended approach for deployments running 26.9 or later.Named API Keys (recommended, 26.9+)
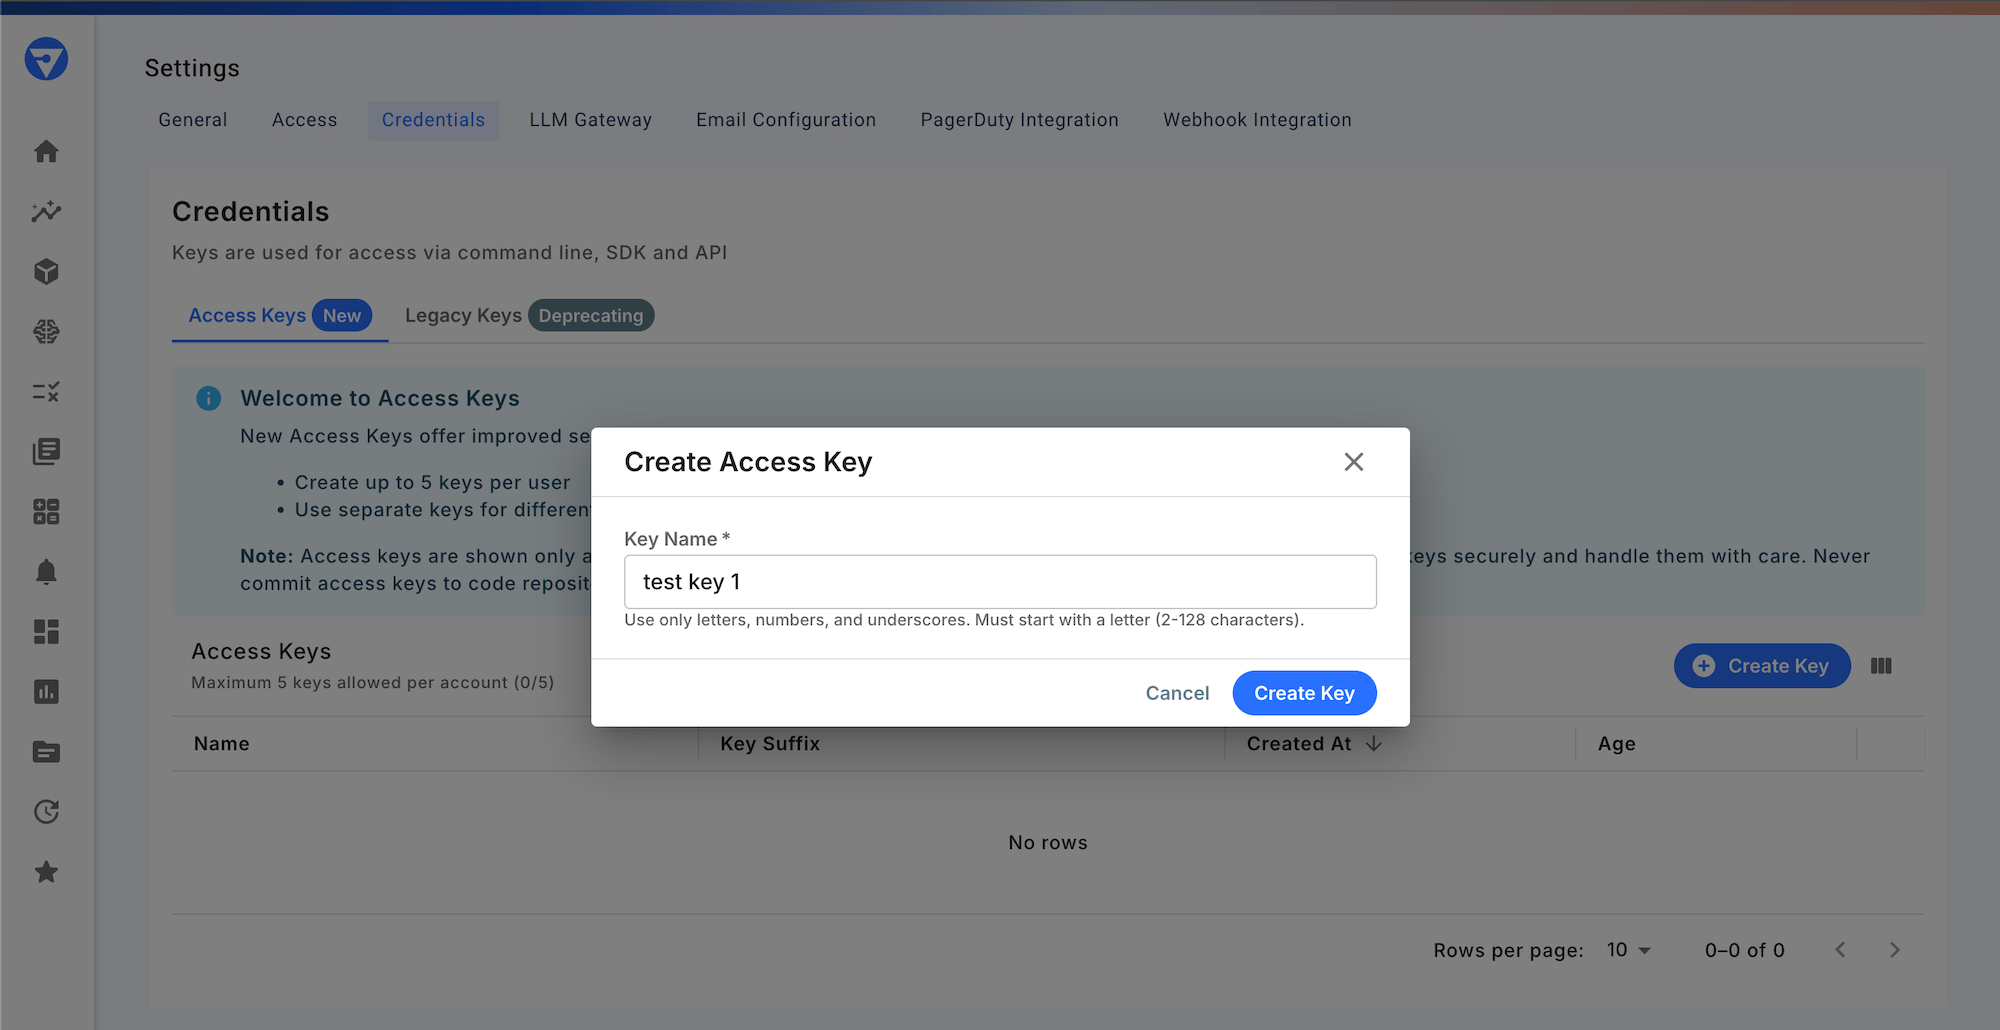
- Click Create Key to open the create dialog.
-
Provide a descriptive name for the key (for example, the integration or environment it will be used for).
Key names must start with a letter and may contain letters, digits, spaces, hyphens, and underscores (1–128 characters). Names must be unique within your own keys.
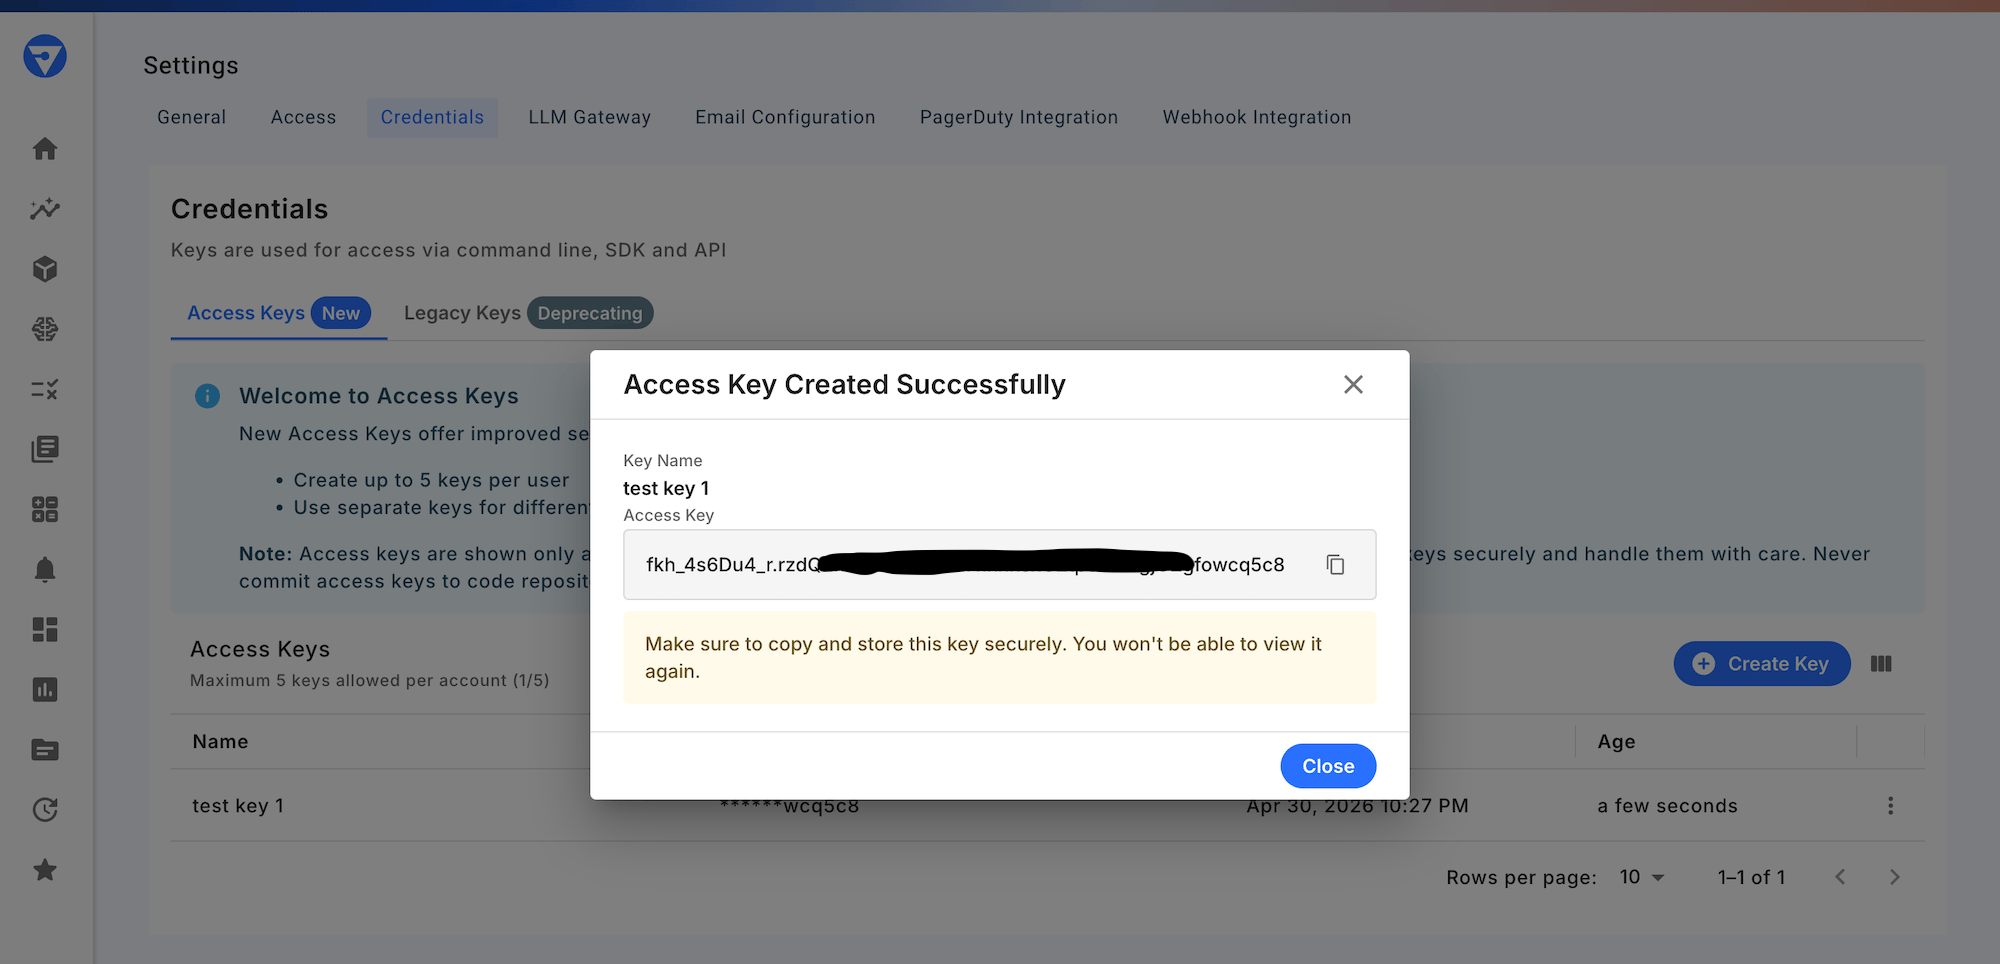
-
Click Create Key. The key is displayed once — copy it immediately and store it securely. Fiddler cannot retrieve it again.
Legacy Single-Key Flow
If your deployment was created before Release 26.9, you may see the legacy single-key view instead. Legacy keys continue to work alongside named API keys — creating a named key does not affect your existing legacy key. We recommend using named API keys for any new integrations.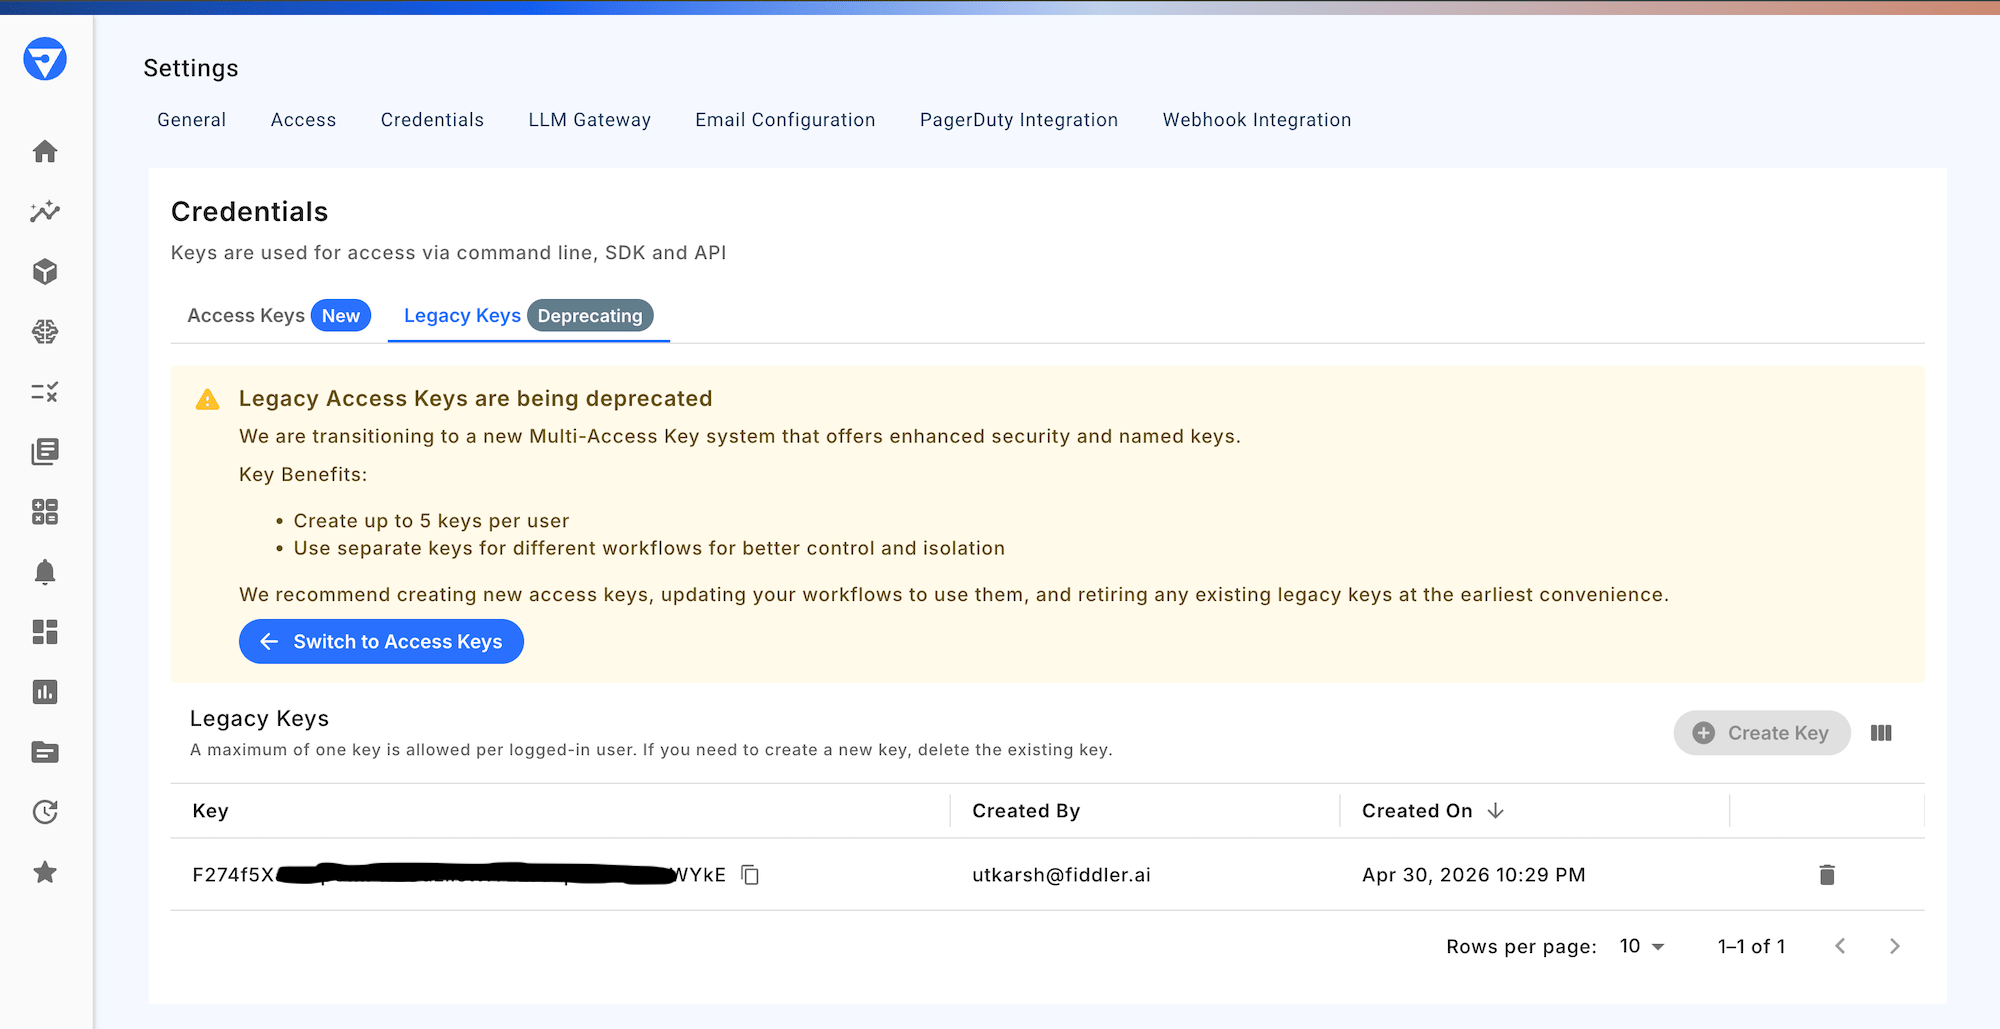
- Click Create Key to generate your key.
- Once created, the Create Key button is hidden — only one key can exist at a time.
- To generate a new key, delete the existing key first. The Create Key button will reappear.
Managing API Keys
- Named API keys: You can create up to 5 per user. On Fiddler Cloud, contact Fiddler Support if you need a higher limit. Self-hosted admins can raise the cap with the
MAX_ACCESS_KEYS_PER_USERenvironment variable. Legacy single-key API keys do not count toward this limit. - Revoking named API keys: Use the ⋮ (more options) menu in the named keys list view. Revocation takes effect immediately; allow up to 5 minutes for all active sessions to reflect the change.
- Revoking a legacy key: Delete the existing key. The Create Key button will reappear when ready.
- Each API key inherits the permissions of the user who created it.
Security Best Practice: Treat API keys like passwords. Never share them or commit them to version control. Copy and store the key immediately at creation — Fiddler cannot retrieve it again. Rotate keys regularly and revoke unused or compromised keys immediately.
LLM Gateway
The LLM Gateway tab allows you to configure and manage LLM provider credentials for AI-powered features throughout the Fiddler platform. Configure LLM providers to enable:- Custom Evaluators - Use your preferred LLM to evaluate model outputs
- Content Analysis - Assess response quality and monitor trust metrics
Email Configuration
The Email Configuration tab manages the email provider for your organization.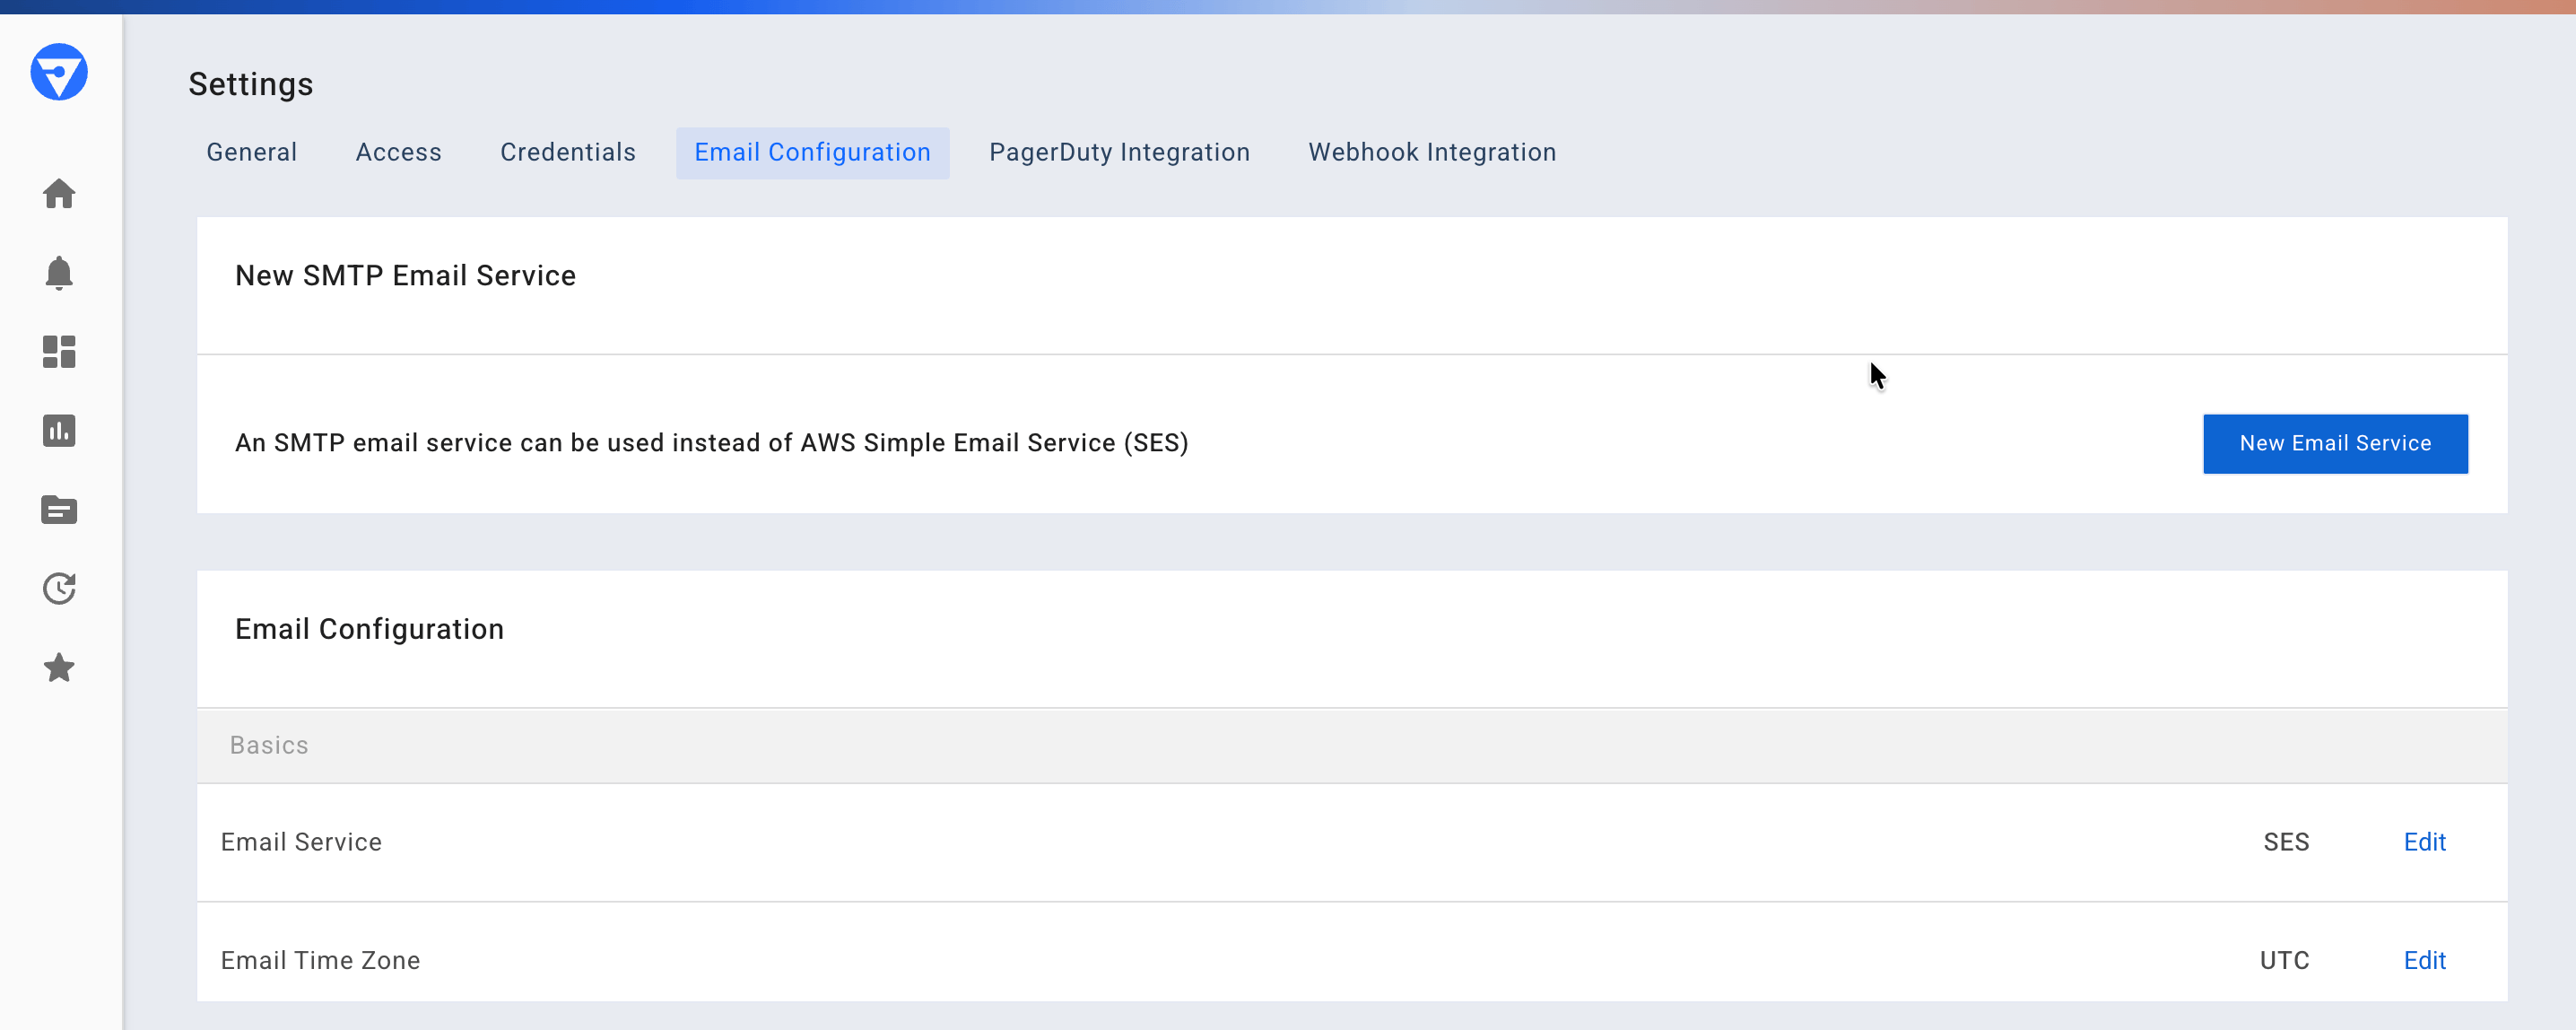
- Selecting SES or SMTP for email delivery
- Fiddler Cloud customers leverage AWS SES
- You may choose to use your own SMTP server by entering your own SMTP connection and credentials details
PagerDuty Integration
The PagerDuty Integration tab enables configuration of PagerDuty services for alert escalation. Setup includes:- PagerDuty service integration keys
- Severity mapping for alerts
- Escalation policy configuration
- Test alert functionality
Webhook Integration
The Webhook Integration tab manages webhook configurations for connecting Fiddler alerts to your notification and communication platforms.Supported Webhook Types
Fiddler supports three webhook provider types:- Slack - Direct integration with Slack channels
- Microsoft Teams - Native Teams channel integration
- Other - Custom webhook endpoints for any platform
Creating a Webhook
Click the plus (+) icon to configure a new webhook:
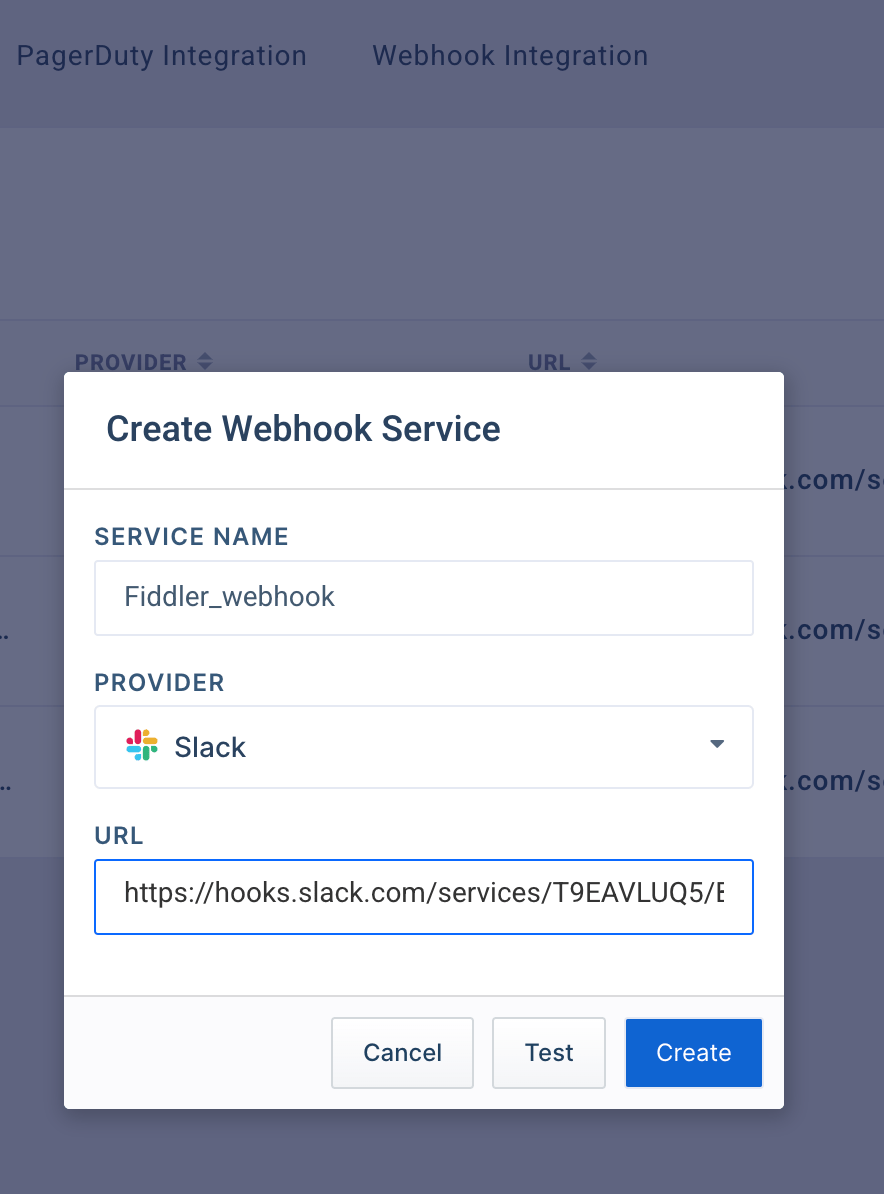
Slack Webhook Configuration
- Enter a unique name in the Service Name field
- Select Slack from the Provider dropdown
- Enter your Slack webhook URL (format:
https://hooks.slack.com/services/...) - Click Test to verify the connection
- Click Create once the test succeeds
Reference See Slack’s webhook documentation for creating webhook URLs.
Microsoft Teams Webhook Configuration
- Enter a unique name in the Service Name field
- Select MS Teams from the Provider dropdown
- Enter your Teams webhook URL provided by your administrator
- Click Test to verify the connection
- Click Create once the test succeeds
Reference See Microsoft Teams webhook documentation for setup instructions.
Custom Webhook Configuration
- Enter a unique name in the Service Name field
- Select Other from the Provider dropdown
- Enter your platform’s webhook URL
- Click Test to verify the endpoint
- Click Create once the test succeeds
Managing Webhooks
Edit or delete existing webhooks using the menu (…) icon for each webhook:- Select the webhook’s menu icon
- Choose Edit Webhook to modify configuration
- Choose Delete Webhook to remove the webhook
Important You cannot delete webhooks that are currently linked to active alerts. Remove the webhook from all alerts before deletion.
Access Requirements
Different settings require specific permissions:| Setting | Org Admin | Org Member |
|---|---|---|
| View General tab | ✓ | ✓ |
| View Access > Users | ✓ | ✓ |
| View Access > Teams | ✓ | ✓ |
| Create/Edit Teams | ✓ | ✗ |
| Create API Keys | ✓ | ✓ |
| Configure LLM Gateway | ✓ | ✗ |
| Configure Email Settings | ✓ | ✗ |
| Configure PagerDuty | ✓ | ✗ |
| Create/Edit Webhooks | ✓ | ✗ |
Related Documentation
- Role-Based Access Control - Understanding user roles and permissions
- Single Sign-On Configuration - Setting up SSO authentication
- Inviting Users - Adding users through the AuthN console
- Alert Configuration - Using webhooks and integrations for alerts