Single Sign on with Azure AD
Configure Azure SSO with Fiddler
Prerequisite
Set up OIDC configuration within Azure by selecting the type as Web and with the redirect URI pointing to your deployment, as seen in the image below.
Redirect URL - {base_url}/api/sso/azuread/callback
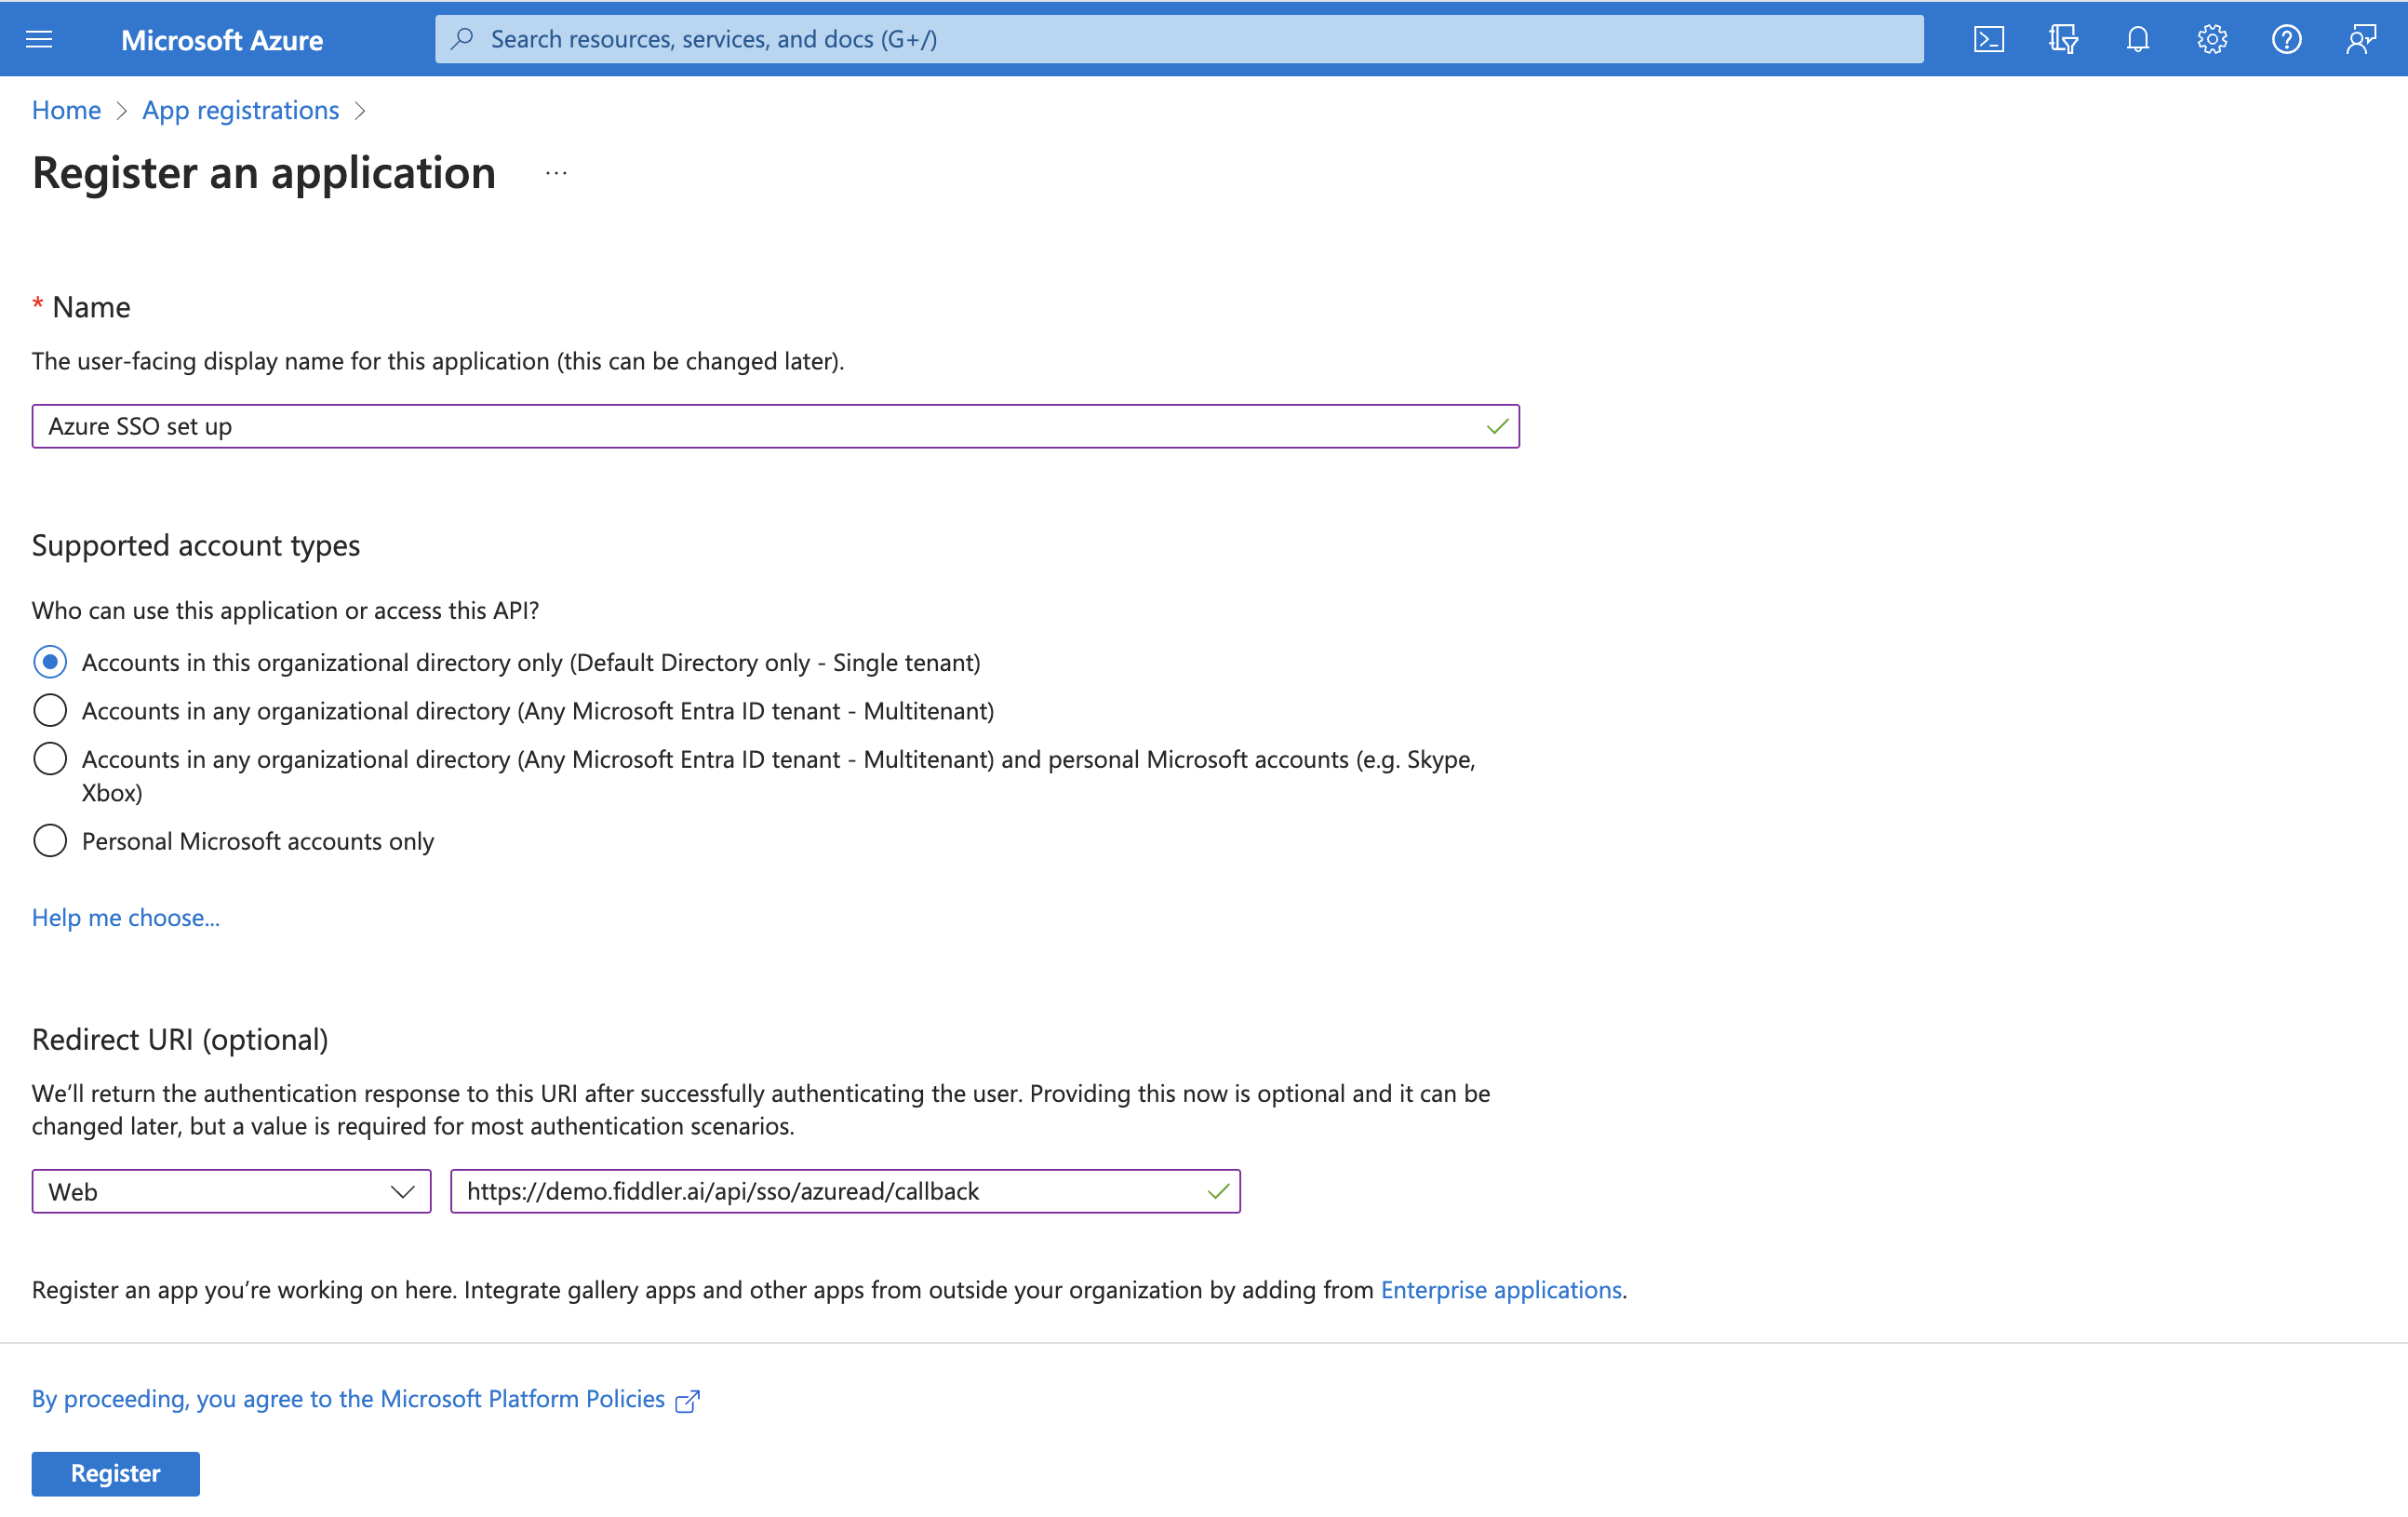
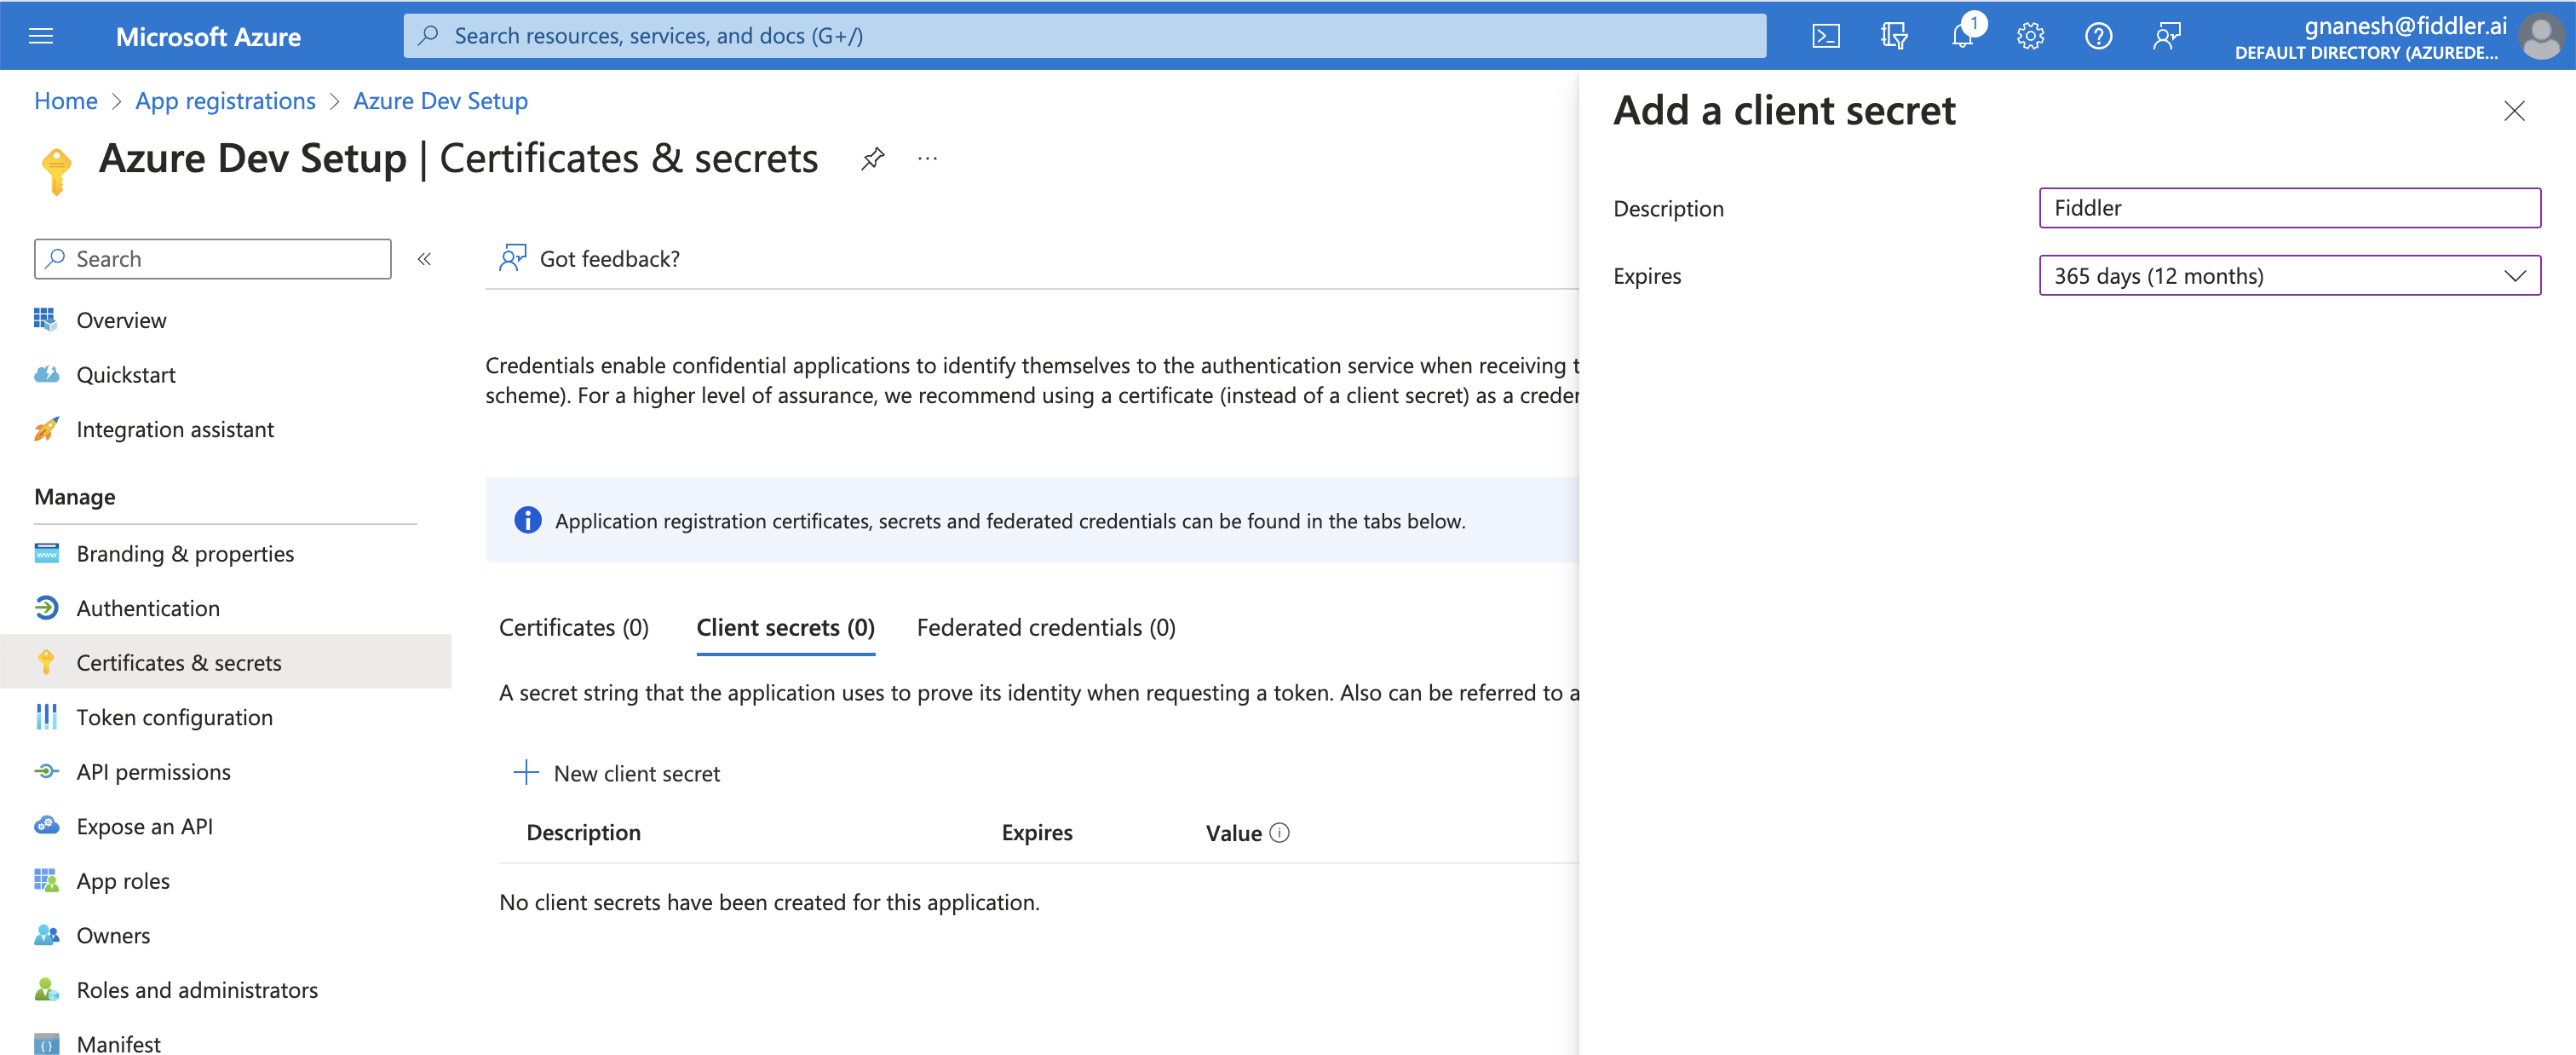
Once the registration is successful, create a new client secret and copy the secret value immediately after it is created without refreshing the page.
Be careful
You will not be able to access the
client secretlater because it is shown ONCE and not repeated
Creating a new client secret
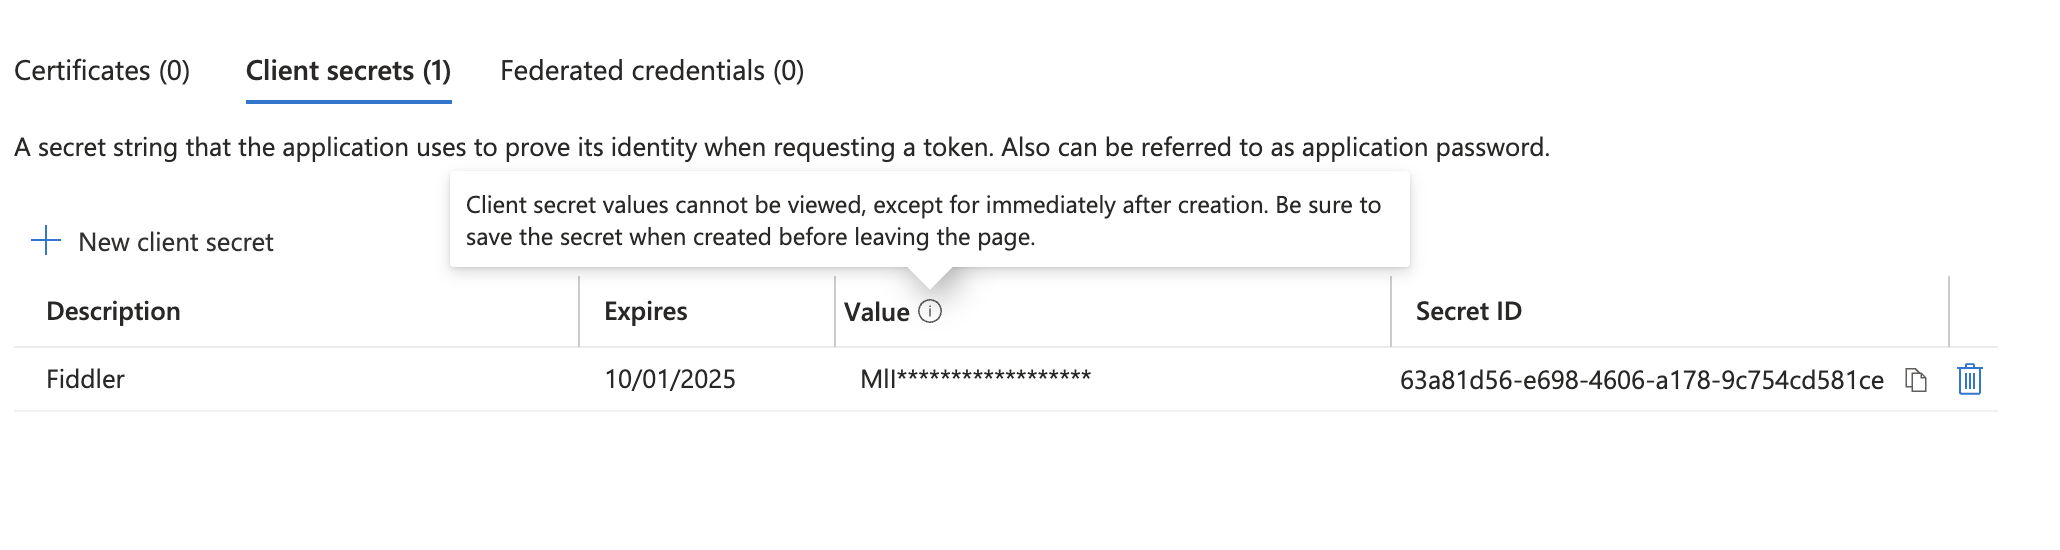
Masked client secret value
Setting up token permissions to the application
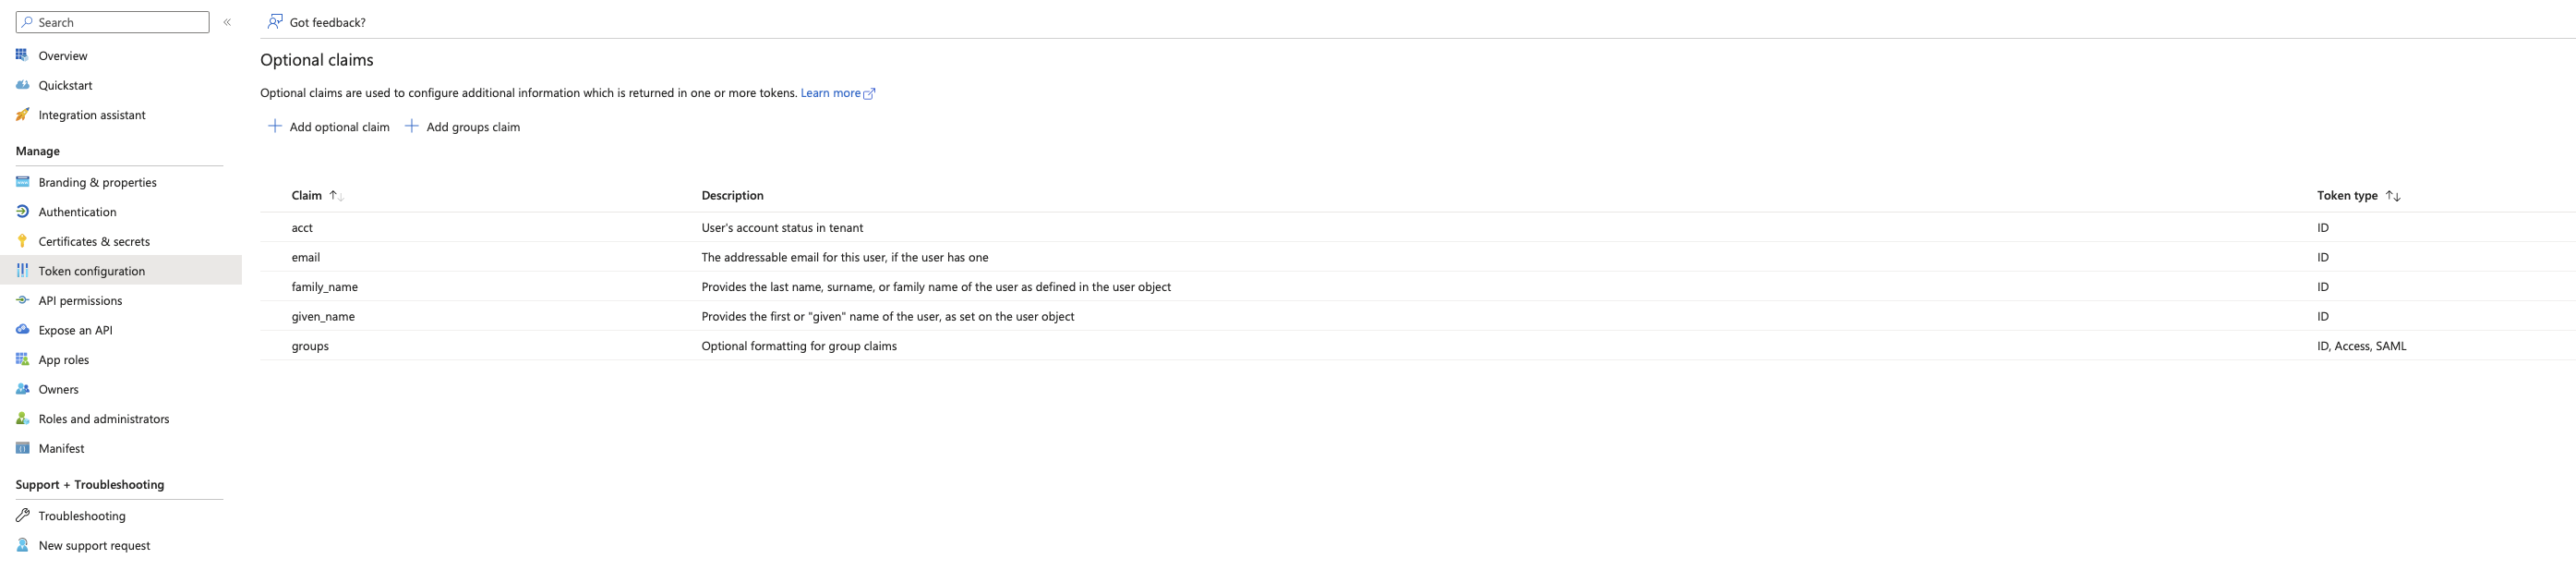
Token Permissions
Setting up API permissions to the application
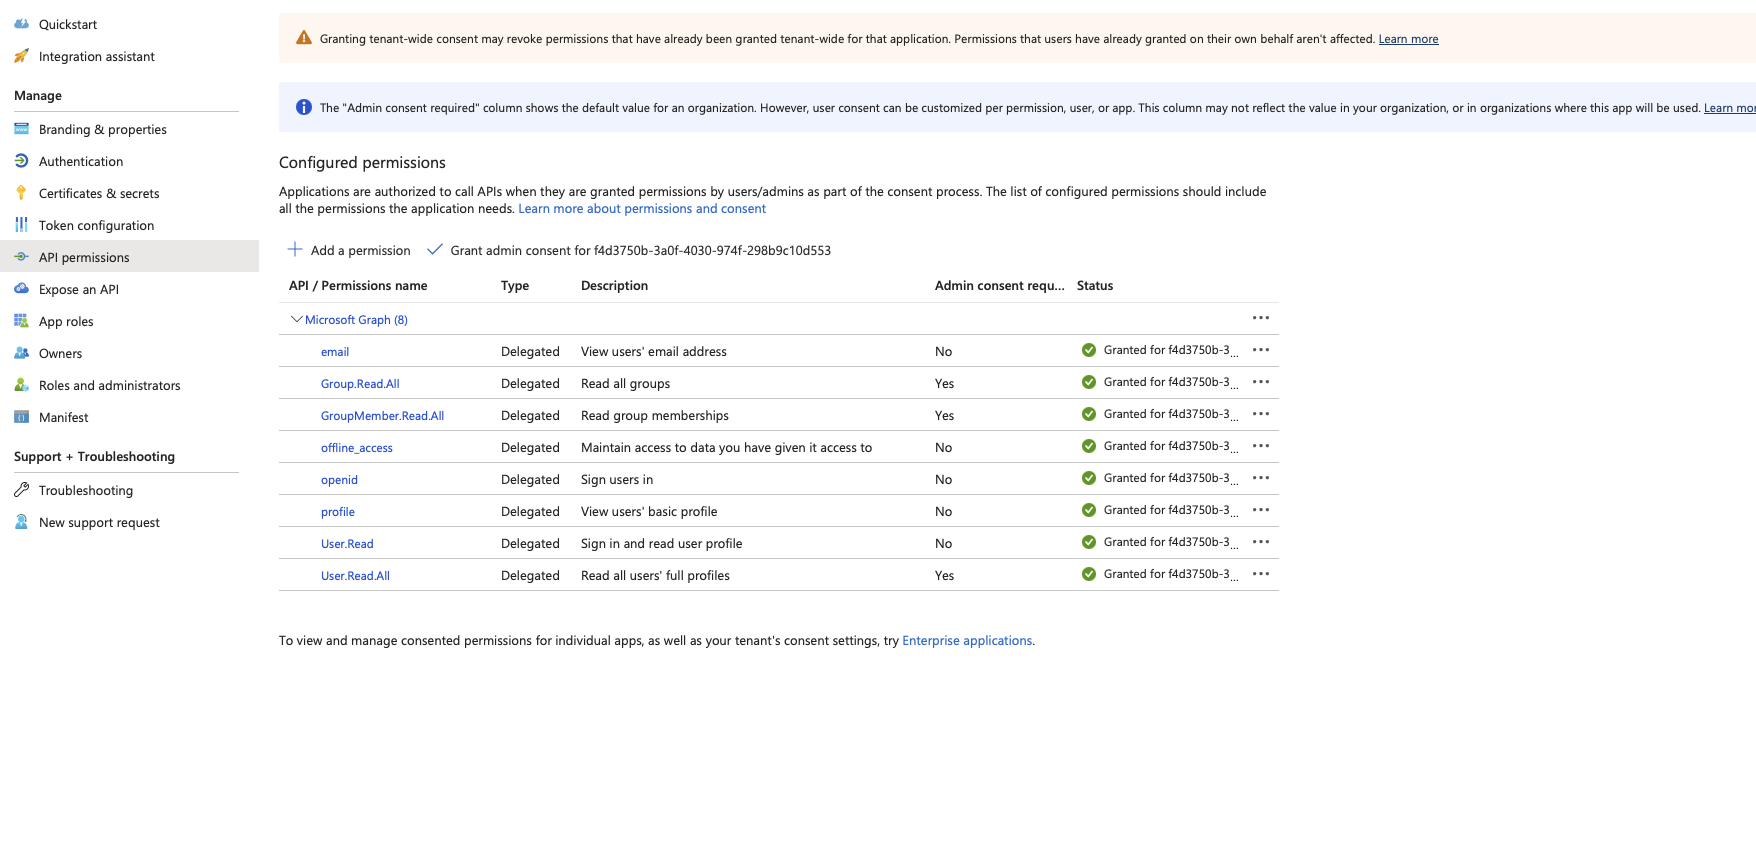
Application Permissions
In Authentication, fill the details as shown below
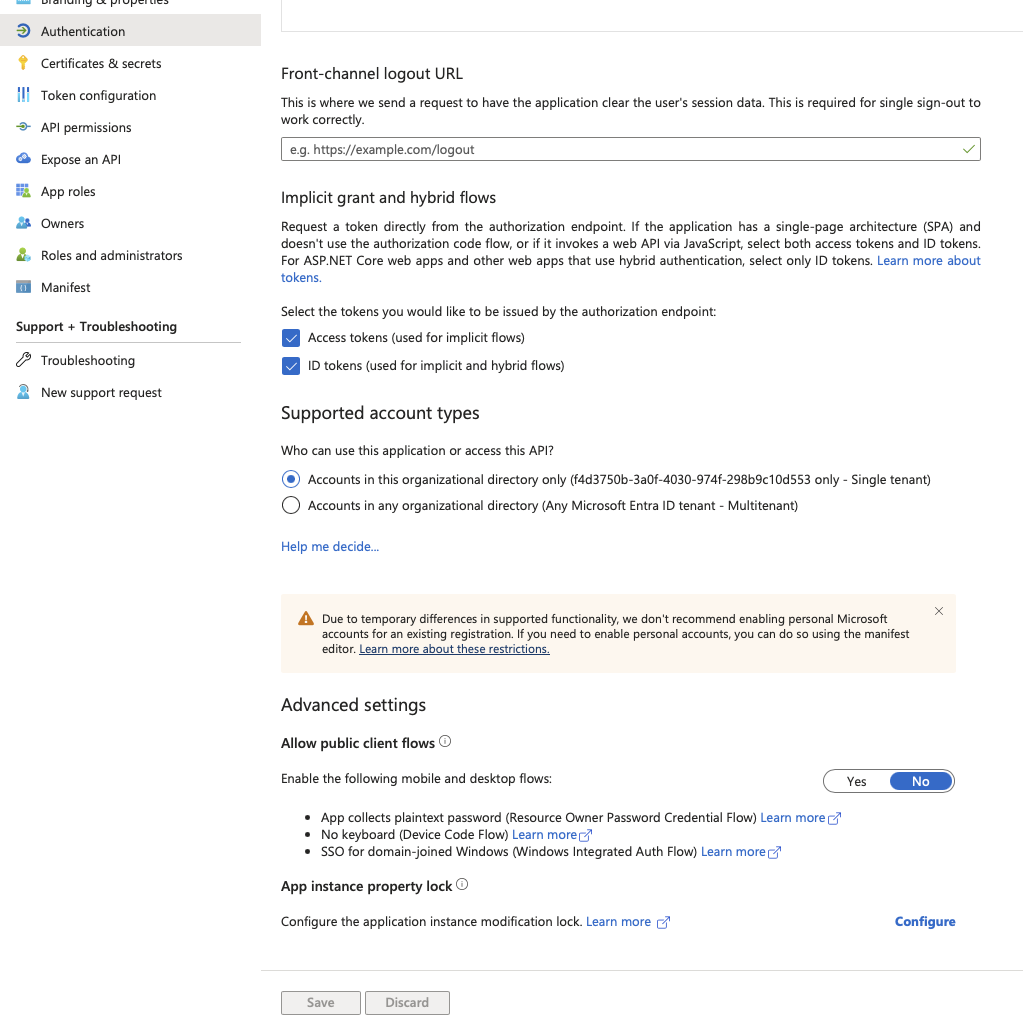
Application Page Updates
Up until this point, our application configuration is complete. The following section now deals with Fiddler side of changes.
Configure Azure SSO with Fiddler
The following details are required to configure Azure SSO with Fiddler:
- OpenID Connect metadata document
sso-azuread-identity-metadata - Application (client) ID
sso-azuread-client-id - Newly created client secret
sso-azuread-client-secret

OpenID Connect metadata Document can be found under Endpoints under the overview section.
The following details can be obtained from the OpenID Connect metadata document URI.
- Response Types Supported
sso-azuread-response-type - Response Modes Supported
sso-azuread-response-mode - Issuer
sso-azuread-issuer - Scopes Supported
sso-azuread-scope
Deployment instructions
Step 1 Create a <secret-filename>.yaml file with the following template
apiVersion: v1
kind: Secret
metadata:
  name: fiddler-sso-azuread-credentials
  namespace: <NAMESPACE_NAME>
data:
  sso-azuread-identity-metadata: <IDENTITY_METADATA_URL>
  sso-azuread-client-id: <CLIENT_ID>
  sso-azuread-response-type: <RESPONSE_TYPE> # set to "code id_token"
  sso-azuread-response-mode: <RESPONSE MODE> # set to "form_post"
  sso-azuread-client-secret: <CLIENT_SECRET>
  sso-azuread-validate-issuer: <VALIDATE_ISSUER> # set to "true"
  sso-azuread-issuer: <ISSUER_URL>
  sso-azuread-scope: <SCOPES> # set to "openid,offline_access,profile,email"
type: Opaque
All the values must be base64 encoded
In mac you can run
echo -n "string to be encoded" | base64to get the encoded value
Do not use doubles quotes
Don’t use doubles quotes anywhere in values in above yaml. In above example, it is written set to “true” - the value is true and not “true”.
Step 2 Update the k8s secret in the namespace of that cluster using the above file.
kubectl apply -f <secret-filename>.yaml -n fiddler
Step 3 Update the Helm variable fiddler.auth.sso.provider and fiddler.auth.sso.azuread.secretName with azuread and fiddler-sso-azuread-credentials value. If you are using the helm values file, use the following settings.
fiddler:
  auth:
    sso:
      provider: azuread
      azuread:
        secretName: fiddler-sso-azuread-credentials
Once the deployments are updated, the new SSO settings will be applied.
Updated 2 days ago